


How to Bleed SRAM Maven Disc Brakes
How to Bleed SRAM Maven Disc Brakes
Just like your favourite coffee stops on a long ride, your SRAM brakes need a little refresh every now and then. SRAM recommends bleeding your mineral oil brakes at least once every two years—though if your brake levers are starting to feel as soft as that mid-ride pastry, it's time to give them some TLC.
In this guide, we'll walk you through the step-by-step process of bringing your SRAM Maven disc brakes back to life. We’ll be working on the SRAM Maven Ultimate on the front, but don’t worry—this process works just as well for other Maven models and the rear brake, too. Let's get started!
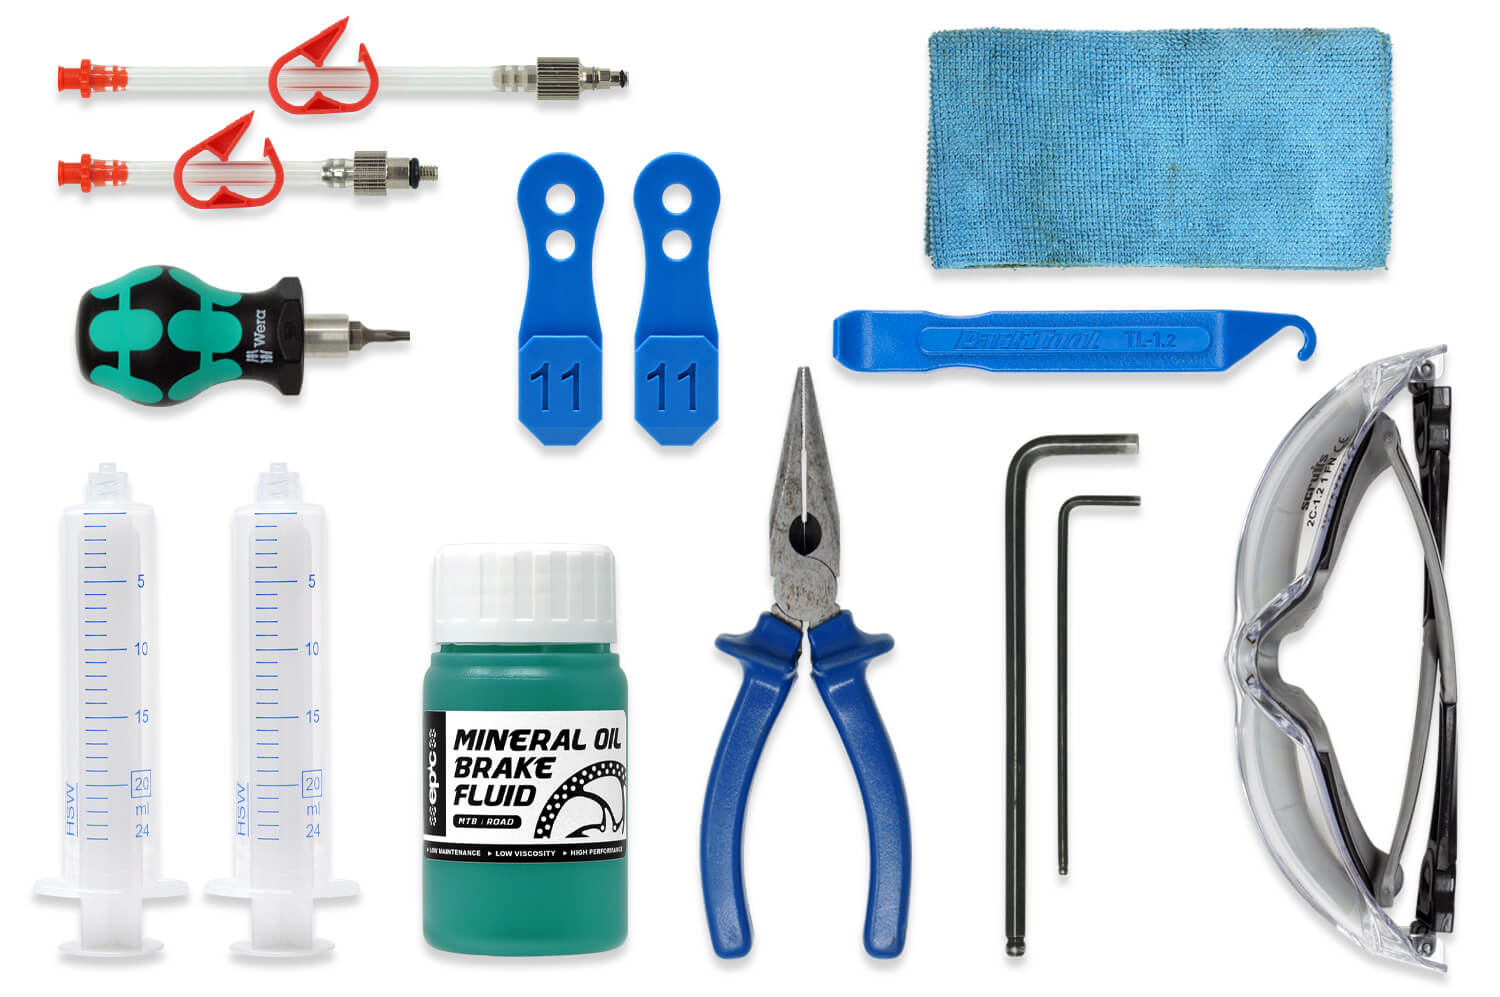
Tools and Supplies
- SRAM Maven Bleed Kit
- Mineral oil brake fluid (included in bleed kit)
- Bleed blocks (included in bleed kit)
- T10 Torx (included in bleed kit)
- 2.5mm hex wrench
- 5mm hex wrench
- Needle nosed pliers (optional)
- Piston press or tyre lever
- Paper towel or clean cloth
- Eye protection
- Protective gloves (included in bleed kit)
- Spray bottle with water or isopropyl alcohol (optional)
- Bicycle work stand (recommended)
SAFETY INSTRUCTIONS
- Always wear safety glasses and nitrile gloves during the bleed procedure.
- Place a container or mat on the floor underneath the area where you will be working on the brake to protect your floor.
- Brake fluid should be disposed of responsibly. Do not pour used mineral oil down the drain or into a sewer. Consult your local council for disposal and recycling guidelines.
WARNING
- Do not use DOT 4 or DOT 5.1 brake fluids when bleeding SRAM Maven brakes or any brakes which are designed to use mineral oil brake fluid. Doing so will damage the system and could result in brake failure.
- Do not allow any brake fluid to come into contact with the braking surfaces. This includes brake rotors and brake pads. In the event of brake fluid contamination, the rotors must be thoroughly cleaned using brake cleaner or isopropyl alcohol and the brake pads must be replaced.
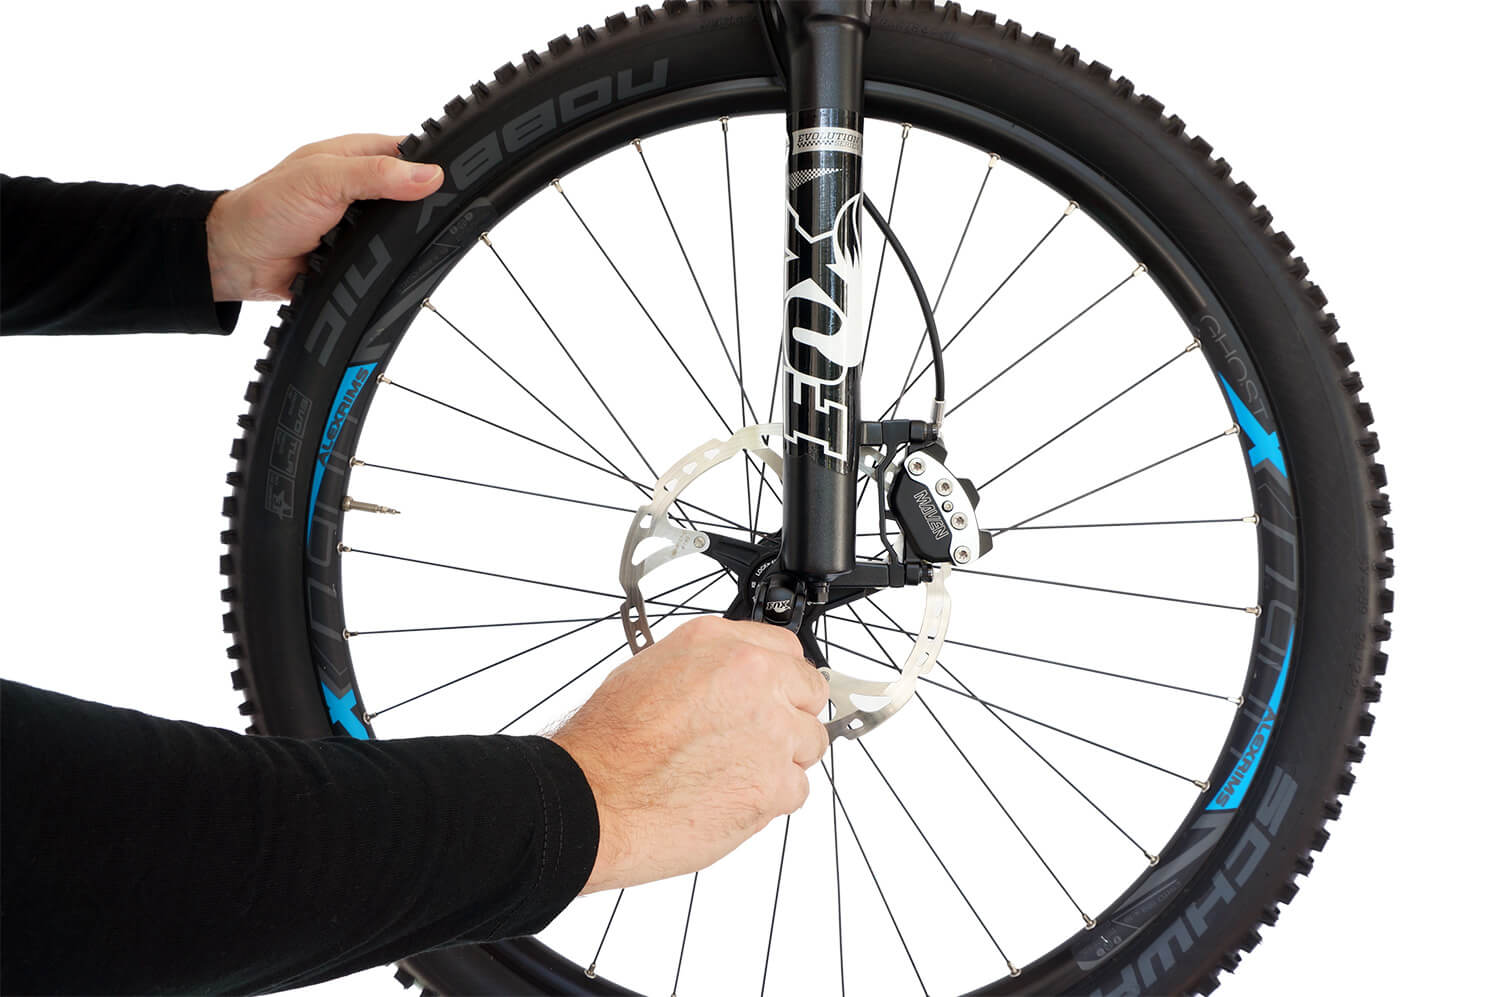
Prepare the Bike
Set your bike up in a work stand and remove the wheel from the bike according to the wheel manufacturer's instructions.

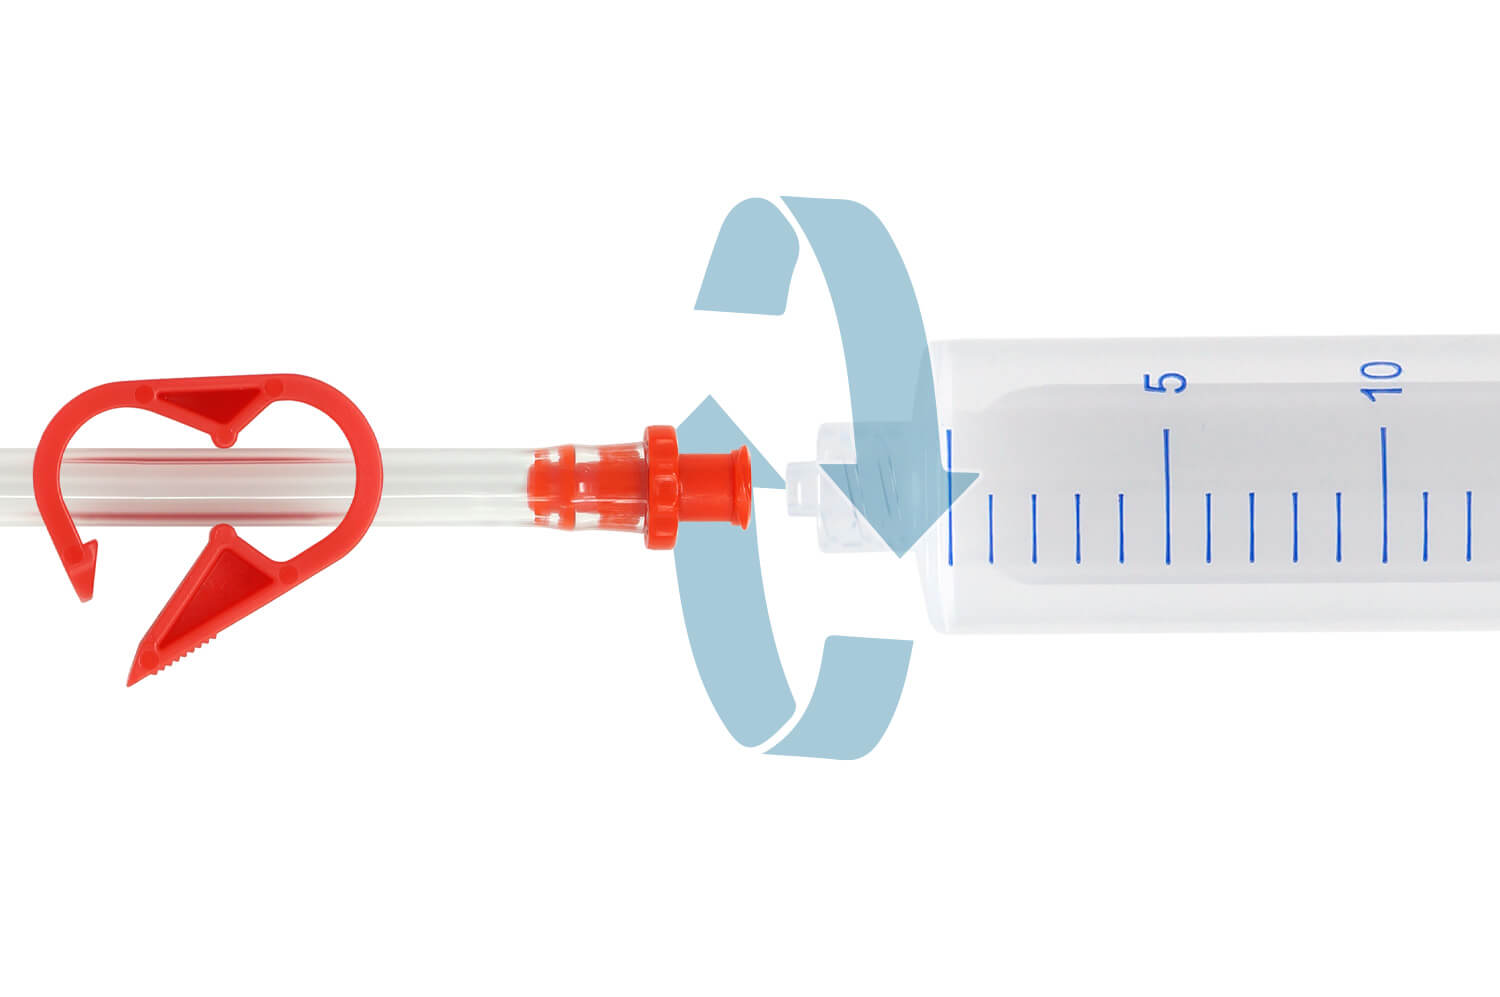
Prepare the Syringes
Step 1
Install a threaded bleed assembly onto one of the syringes. This will be the lever syringe. Then install the longer bleed fitting onto the other syringe for the calliper.
Step 2
Fill the lever syringe with mineral oil brake fluid until it is around 3/4 full. Then fill the calliper syringe until it is around 1/4 full. DO NOT use DOT brake fluid to bleed SRAM Maven brakes.

Step 3
Carefully remove the air from both syringes by covering the tip with paper towel and pushing the syringe plunger to push out all of the air from inside the syringe and tubing. Close the clamps on both syringes.

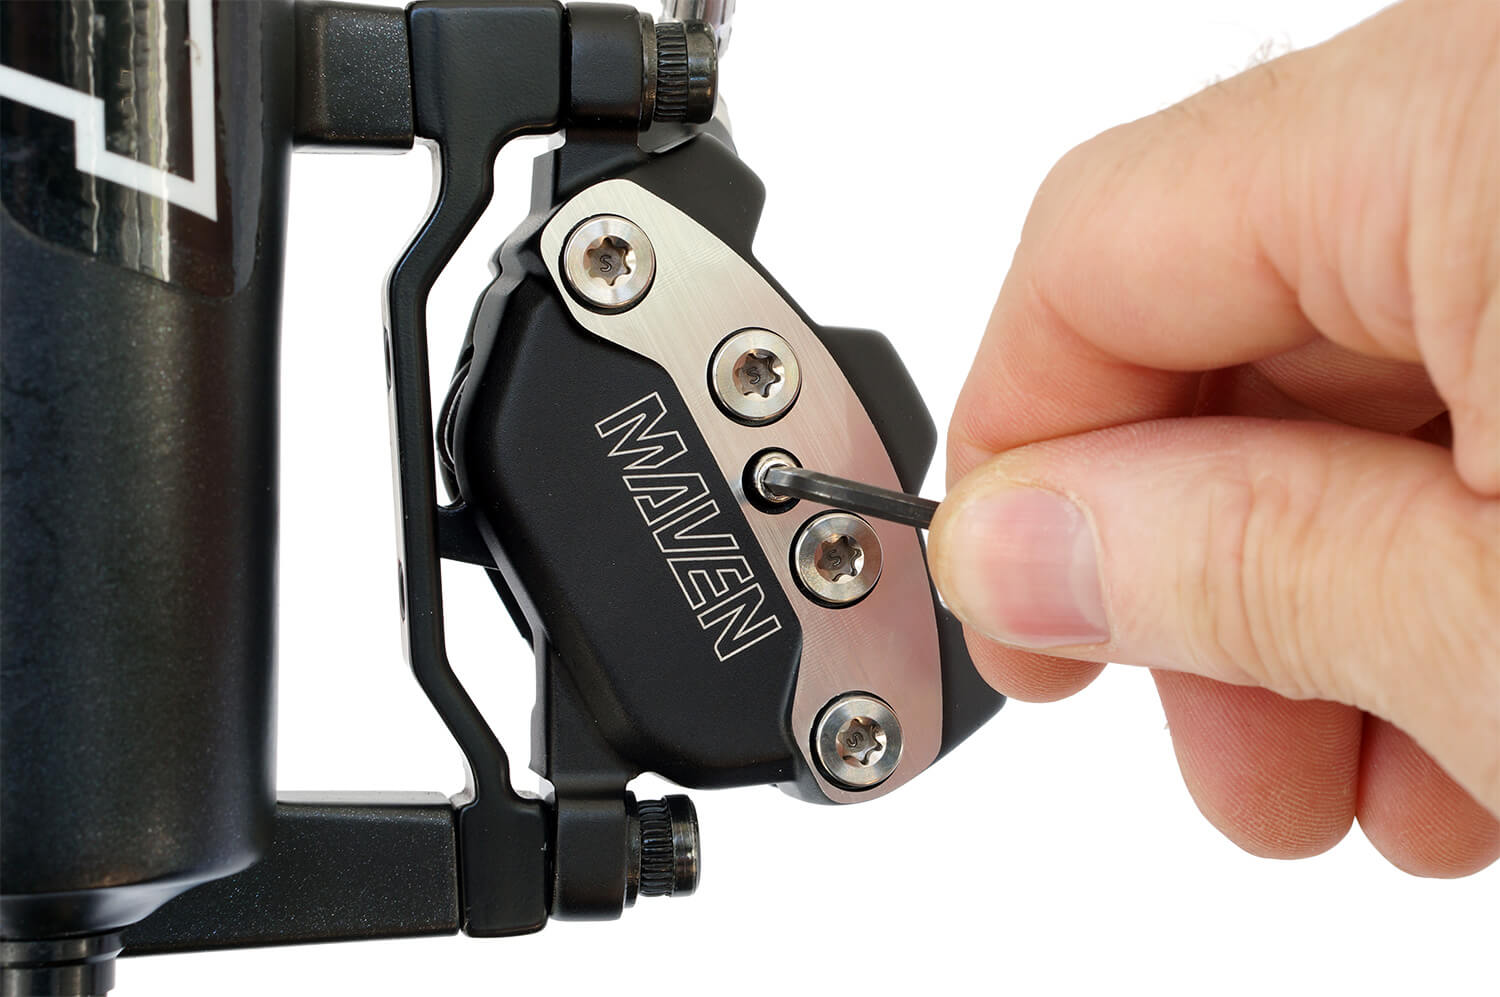
Prepare the Calliper
Step 1
Remove the e-clip using a 2.5 mm hex wrench.


Step 2
Using a 2.5mm hex wrench, remove the brake pad retaining bolt and then remove the brake pads from the calliper.


Step 3
Use a piston press, tyre lever or similar tool to push the calliper pistons back as far as they will go.

Step 4
Insert the bleed blocks - one for each set of pistons.


Step 5
Remove the rubber cover from the Bleeding Edge bleed port.


Step 6
Using a 5mm hex wrench, loosen the bleed port valve slightly and then gently retighten. Wipe away any mineral oil that drips from the bleed port with a paper towel or cloth.


Step 5
Insert the syringe with the Bleeding Edge tool into the bleed port until it clicks into place. Rotate the tool counter-clockwise one full turn to open the system and open the syringe clamp.


Prepare the Lever
Step 1
Adjust the lever reach adjuster until the lever blade is 75-80mm from the centreline of the handlebar.

Step 2
If your lever has a Contact Point Adjustment, turn the adjuster away from the arrow until it stops.


Do not force the contact adjuster past the stop point; it may damage brake components.
Step 3
Remove the bleed screw from the lever using a T10 TORX wrench.

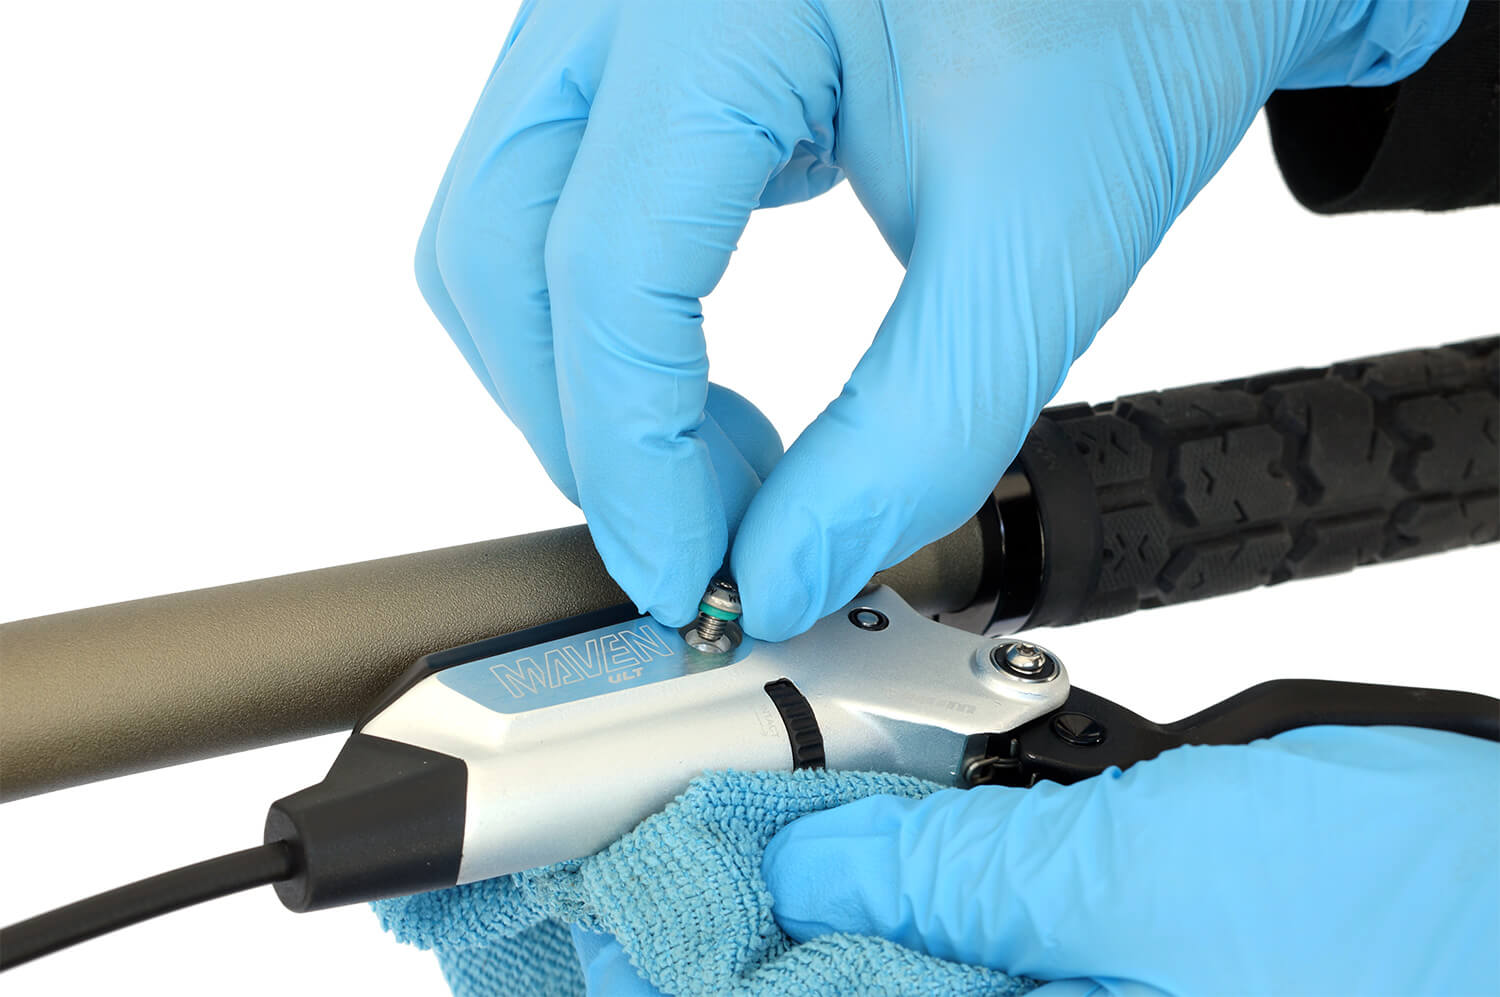
Step 4
Thread the 3/4 full syringe into the brake lever bleed port and open the clamp. Wipe away any mineral oil that drips from the bleed port with a paper towel or cloth.


Bleed the System
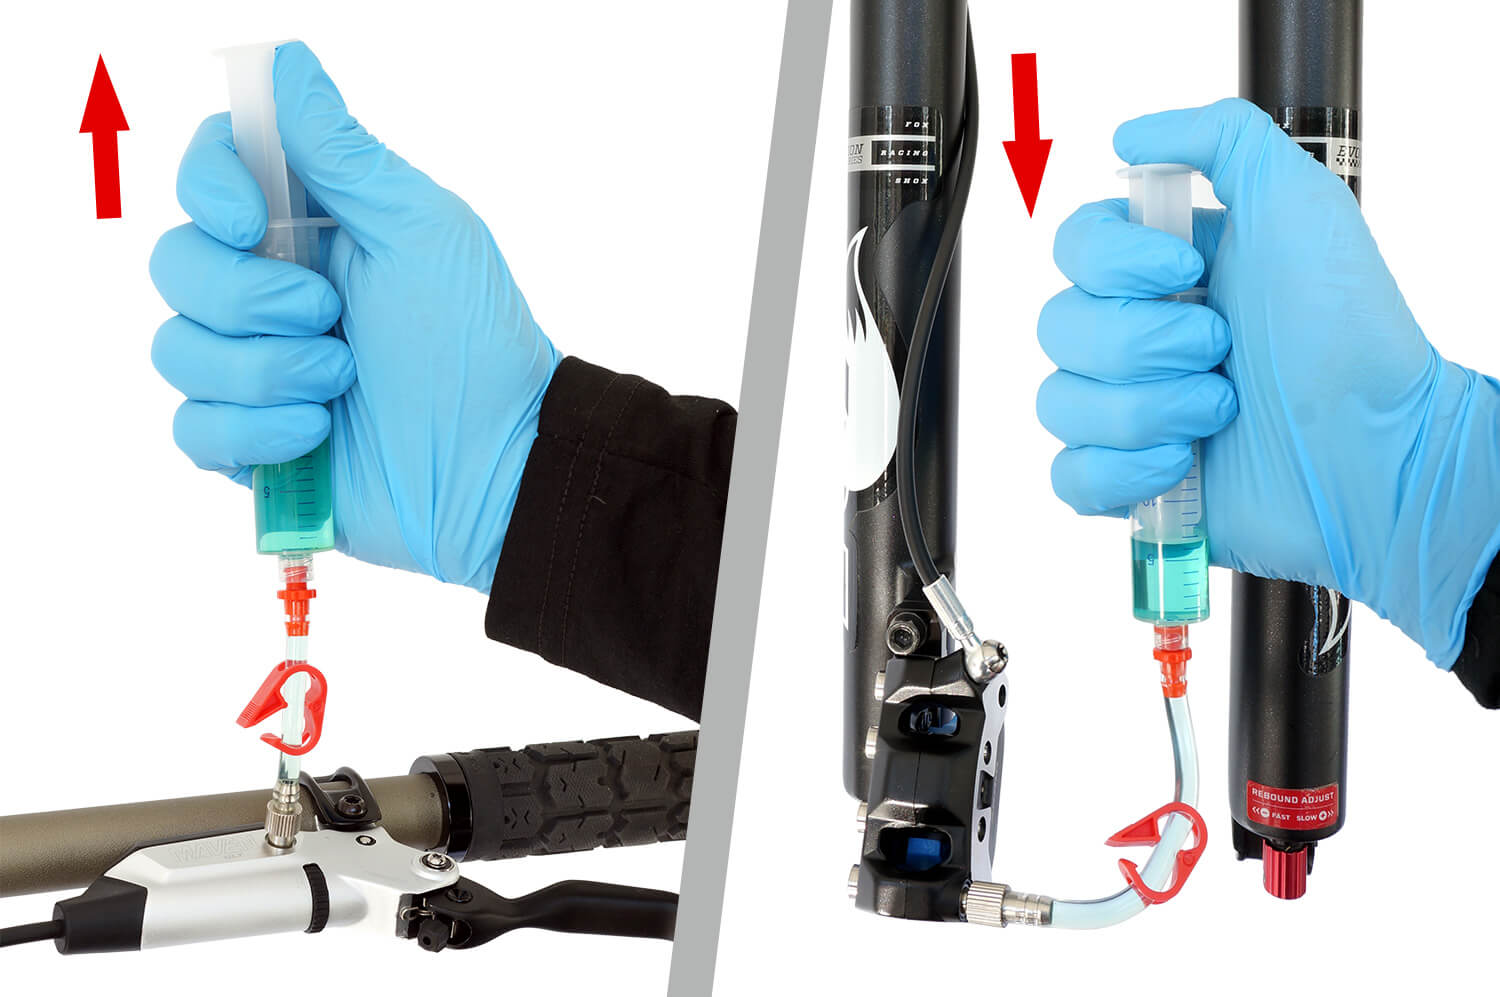
Step 1
Hold the lever syringe vertically and gently push down on the syringe plunger, stopping before any air enters the brake system. Oil will flow down through the system and into the calliper syringe.


If the oil entering the calliper syringe is discoloured, continue to push all of the old oil out of the system and restart the bleed procedure with new oil in both syringes.
Step 2
Now hold the calliper syringe upright and gently push down on the calliper syringe plunger to push oil back towards the lever syringe, stopping before any air enters the brake system. If needed, slowly pull on the lever syringe plunger to assist in drawing oil from the calliper syringe.
Step 3
Repeat this process of moving oil from one syringe to the other until no more air can be seen exiting the system at either end.
Step 4
Close the clamp on the calliper and lever syringes.


Step 5
Rotate the Bleeding Edge tool clockwise until it stops in order to close the system.
Step 6
Remove the calliper syringe and bleed fitting by pulling the fitting straight out from the calliper bleed port.

Step 7
Use a 5mm hex wrench to tighten the Bleeding Edge bleed valve to 1.8Nm (16in-lb).
Step 8
Wipe away any mineral oil brake fluid which may drip from the bleed port with a paper towel or cloth.
Step 9
Open the clamp on the lever syringe.
Step 10
Squeeze and release the lever blade 3-5 times allowing it to snap back to its resting position. This will help to dislodge any air bubbles which may still be trapped in the master cylinder.


Step 11
While holding the lever syringe vertically, create a vacuum by pulling on the syringe plunger. Then compress the plunger to pressurize the system. Repeat until no more bubbles appear.

Step 12
Lightly compress and release the lever syringe plunger to equalise the pressure inside the system.
Step 13
Close the clamp on the syringe at the lever.
Step 14
Remove the syringe from the lever bleed port by unthreading the bleed fitting. Wipe away any mineral oil that drips from the bleed port with a paper towel or cloth.

Step 15
Reinstall the lever bleed port screw by using the T10 TORX tool. Tighten the bleed screw on the lever to 1.6 Nm (14 in-lb).

Step 16
Wipe away any mineral oil that drips from the bleed port with a paper towel or cloth.
Step 17
Spray isopropyl alcohol or water onto the lever and clean with a paper towel or cloth.

Clean Up and Reassemble
Step 1
Remove the bleed blocks from the calliper.
Step 2
Spray isopropyl alcohol or water onto the calliper and clean with a paper towel or cloth.
Step 3
Install the rubber bleed port cover.

Step 4
Remove or replace your rubber gloves to avoid contaminating the brake pads and reinstall the brake pads into the brake calliper.

Step 5
Install the brake pad retainer bolt using the 2.5mm hex wrench and tighten to 1.1 Nm (9 in-lb) and then reinstall the e-clip.

Step 6
Reinstall the wheel according to the wheel manufacturer's instructions.
Step 7
Lightly squeeze and release the brake lever repeatedly to advance the calliper pistons. The first couple of squeezes will feel slack as the pistons advance, this is normal. The lever should feel firm after 3-4 pulls.

Step 8
At the calliper, check that the brake pads are evenly spaced on either side of the brake rotor. If they are not, loosen the calliper fixing bolts using a 5mm hex wrench and adjust the alignment of the calliper. Tighten the bolts to 9.5Nm (85 in-lb).


Wrap Up
And there you have it! Your brakes should now feel sharper than your best sprint finish. Regularly bleeding your SRAM Maven disc brakes is key to keeping them in trail-ready condition and those internals squeaky clean.
Remember to give your brakes a quick test to make sure they’re working like a dream. Oh, and don't forget to clean your bleed kit with some soapy water — future you will thank you when it’s time for another tune-up!
NOTICE
Brake fluid must be disposed of responsibly. Do not pour used mineral oil down the drain or into a sewer. Consult your local council for disposal and recycling guidelines.
FAQ
How often should SRAM Maven brakes be bled?
We recommend bleeding SRAM Maven brakes every two years. Unlike DOT fluid, mineral oil doesn’t absorb moisture, allowing for longer service intervals and more consistent performance between bleeds. Read more
What should I do if my brake lever feels spongy after bleeding the brakes?
If your brake lever feels spongy after bleeding, it’s likely due to trapped air in the system. Re-bleed the brakes carefully, ensuring all air bubbles are removed, and check for any leaks around the calliper or master cylinder. Read more
What can I do if DOT brake fluid was used to bleed my SRAM Maven brakes?
If the wrong brake fluid was used, the brakes could be damaged. The longer it's left in, the worse the impact. Start by flushing the system with the correct fluid, but you may need to dismantle, clean or replace seals and rebuild the brake. In some cases, full brake replacement may be necessary.
What should I do if my brake pads are dragging on the rotor after bleeding?
If your brake pads are dragging on the rotor after bleeding, re-check the calliper alignment and ensure it’s properly positioned with equal spacing between the brake pads and the rotor on both sides. If necessary, realign the calliper while applying the brake lever to centre it, then recheck for any interference.
Why do my brakes feel overly firm with no modulation?
If your brakes feel overly firm with no modulation, it may be due to overfilling the brake system with fluid resulting in excessive pressure in the system. This can happen if the calliper pistons were not fully reset prior to bleeding the brake or if the brake is bled with the brake pads and wheel in situ. To fix this, remove the lever bleed port screw and fully push back the calliper pistons to restore the correct fluid level and balance the system. Read more
Why do my brakes make noise when I apply them after bleeding?
If your brakes are making noise after bleeding, it may be due to brake pad contamination with brake fluid, which will also reduce braking power. In this case, it’s almost always necessary to replace the contaminated pads with new. Remember to clean the rotor surface with isopropyl alcohol or brake cleaner thoroughly before installing new pads.


