

How to Bleed New Shimano Brakes
How to Bleed New Shimano Brakes
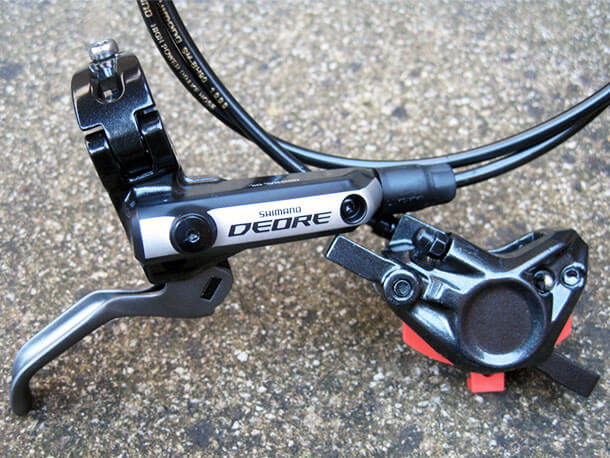
In this guide we're going to show you how to bleed the newer (2012-on) Shimano brakes with the our Shimano Bleed Kit. As many of you will know the bleed procedure has changed significantly since the release of the latest brake models and has seen the inclusion of extra equipment to get the job done.
What's New for 2012
Well, traditionally to bleed your trusty Shimano brake set all you needed was a bottle of mineral oil and a length of correct sized tubing to attach to the bleed nipple, we left the rest down to the lever. That's all changed and now Shimano have made it pretty much mandatory to use their bleed funnel by incorporating a bleed port into their reservoir caps. This was of course until we released our new Shimano bleed kit.
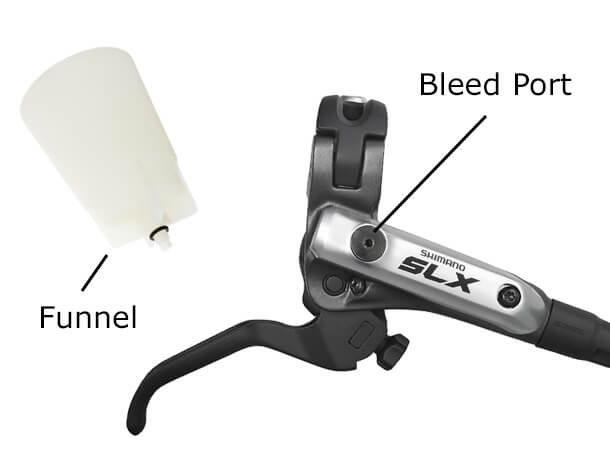
The Shimano funnel was designed to act as a temporary extended reservoir to catch and hold mineral oil as it is purged from the brake system. It saves you the hassle of removing the reservoir cap and the rubber diaphragm from the master cylinder so in theory it should result in a quicker bleed once you've gotten used to the new bit of kit.
Our substitution for the Shimano funnel comes in the form of our syringe and threaded master cylinder adaptor which you won't find anywhere else. So let's get started!
Things you'll need
- Shimano Bleed Kit
- Paper towels/lint free cloth
- 2.5mm, 4mm & 5mm Hex wrench
- 7mm ring spanner
The Kit
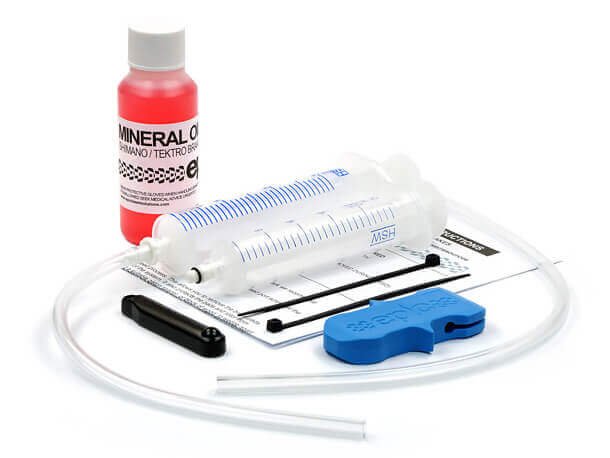
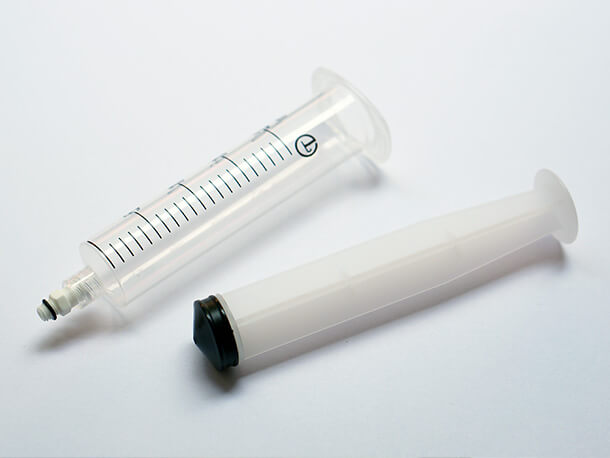
A quick inspection of the kit should ensure you have all the necessary equipment including the 30ml injection syringe, extra vent tube, our bleed port syringe with threaded bleed adaptor and a couple of cable ties. Also included in the kit is 50ml of genuine Shimano Mineral Oil brake fluid, so no worries of fluid incompatibility or voided warranties. (Update: Bleed Block & Rotor Tool now included!)
Step 1
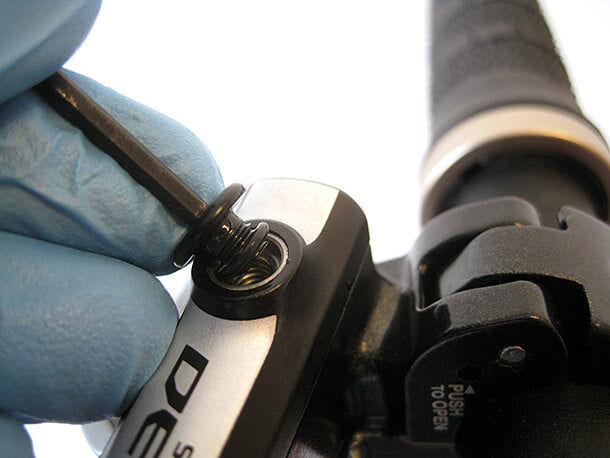
Set the brake lever so that it is in the riding position at roughly 45 degrees to the ground, and then remove the lever bleed port screw and o-ring. Place them in a safe place. If the o-ring does not come out with the screw, carefully remove it using the tip of your Allen key or similar tool.
Step 2
Open your Shimano bleed kit and remove the plunger from the master cylinder syringe.
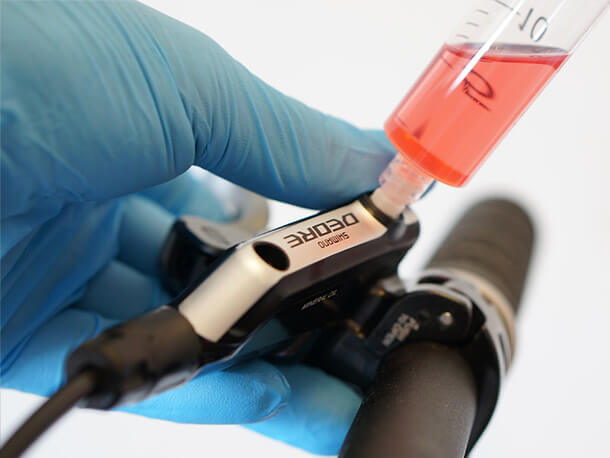
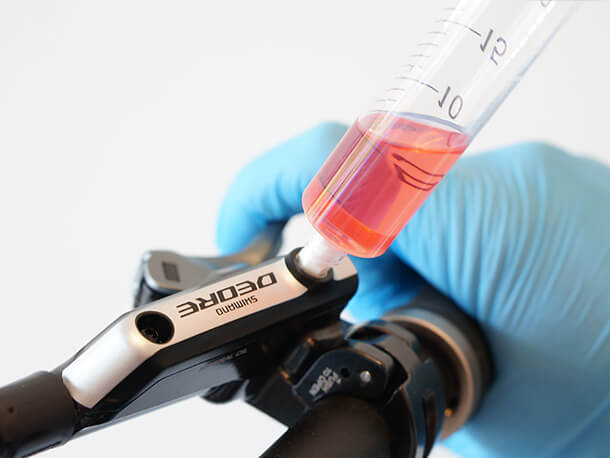
Step 3
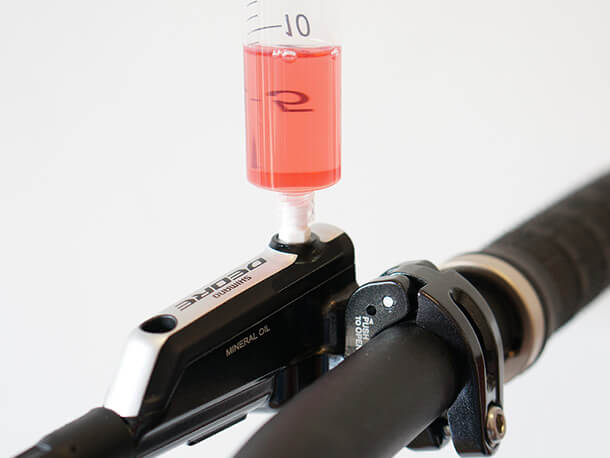
Screw the master cylinder syringe with white threaded adaptor into the bleed port. Do not over-tighten.

Step 4
Draw 20ml of mineral oil from the bottle with the 30ml syringe by inserting the tubing into the bottle and pulling back on the syringe plunger. Then invert the syringe so that the tubing is pointing up. Push on the plunger slowly to remove all air from within the syringe and tubing. This will ensure that you don't introduce any more air into the brake.
Step 5
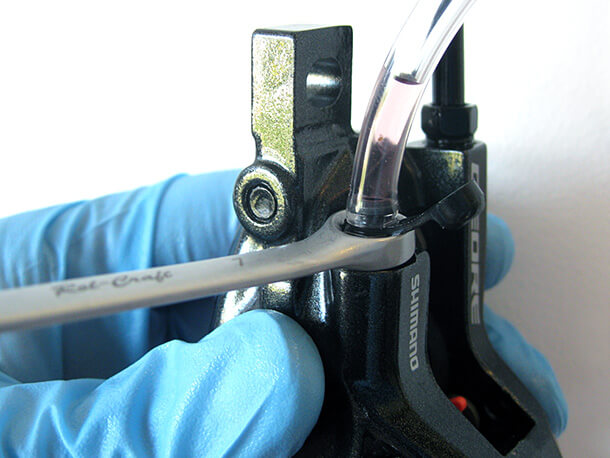
Remove the rubber cap covering the caliper bleed nipple and set in place a 7mm ring spanner. Then attach the syringe tubing to the bleed nipple forming a seal.
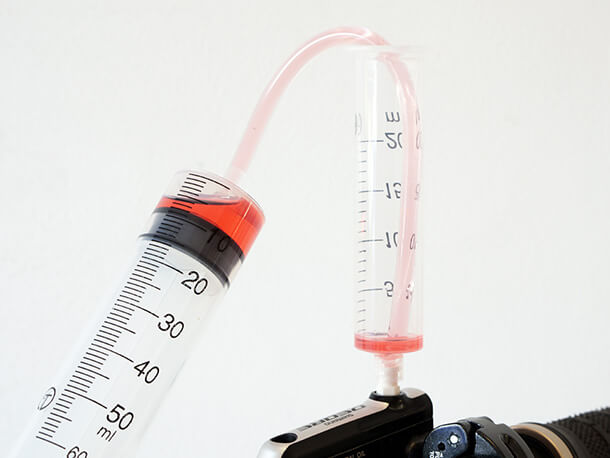
Step 6
Open the bleed nipple by turning the spanner 1/4 turn. Push the plunger to inject oil. The oil will start to come out of the lever bleed port and into the lever syringe, taking with it any air which was present inside the brake system.
| Use two hands for this step to stop the tubing from becoming disconnected from the bleed nipple under the weight of the 30ml syringe. |
| If the fluid entering the lever syringe is particularly discoloured this indicates that the fluid is very old. If so, we recommend flushing the system twice to flush out all of the old fluid. |
Step 7
Continue to inject oil until no more air bubbles are mixed with the fluid entering the lever syringe. Don't allow the fluid to overflow the lever syringe. Once there are no more air bubbles, temporarily close the bleed nipple and disconnect the syringe and tubing.
| Do not operate the brake lever at this time. Air may become trapped within the calliper and will take longer to remove. |
Step 8
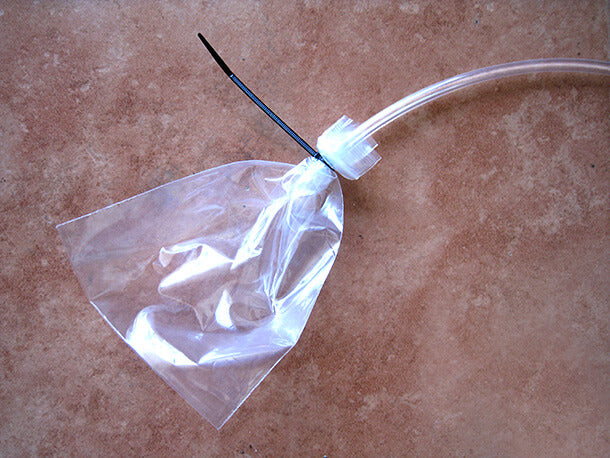
Take the transparent vent tube, a cable tie and a plastic bag. Insert the tube into the bag and secure the bag to the tube with the cable tie (or an elastic band). Then, with the spanner still in place, connect the free end of the tube to the calliper bleed nipple.
Step 9
Open the bleed nipple 1/4 turn once again. After a short while fluid level in the lever syringe will drop as fluid and any remaining air from within the brake calliper will enter the plastic bag. Close the bleed nipple before all of the fluid drains from the lever syringe.
| Do not allow all of the mineral oil to drain from the lever syringe as this will introduce air into the brake and you will need to repeat the entire process. Ensure that a minimum 5ml of mineral oil remains inside the lever syringe at all times. |
| Tapping the calliper body and brake line with a screwdriver handle or similar may help to dislodge any trapped air bubbles. It may also help to move the position of the calliper at this time. |
Step 10
Once there is no more air bubbles mixed with the oil leaving the calliper vent tube, temporarily tighten the bleed nipple.
Step 11
With the brake lever depressed, open and close the bleed nipple in rapid succession (for approximately 0.5 seconds each time) to release any air bubbles which may still remain in the calliper.
Repeat this process 2-3 times. Then, whilst still holding the brake lever to the bar, tighten the bleed nipple to 4-6Nm (35-53 in.lbs). Remove the tubing from the bleed nipple and replace the rubber bleed nipple cap.
Step 12
Operate the brake lever 4-5 times allowing it to snap back into its resting position. This will encourage any air bubbles within the master cylinder to rise up into the lever syringe. The normal condition is for the brake lever to be stiff at this point.
Step 13
Loosen the lever unit fixing bolts so that you can rotate the lever unit freely on the handlebar. Set the brake lever unit on the handlebar so that it is horizontal (parallel to the ground) and repeat Step 12 to check that there is no remaining air.
Tilt 30 degrees above and 30 degrees below and repeat Step 12 again to rid the system of all remaining air bubbles.
Repeat the process of rotating the lever unit whilst operating the lever until there are no more air bubbles exiting the bleed port. Temporarily tighten the lever unit fixing bolts with the lever in the horizontal position.
Step 14
Remove all of the fluid from the lever syringe with your 30ml syringe and tubing by immersing the tip of the tube into the mineral oil and pulling back on the syringe plunger.
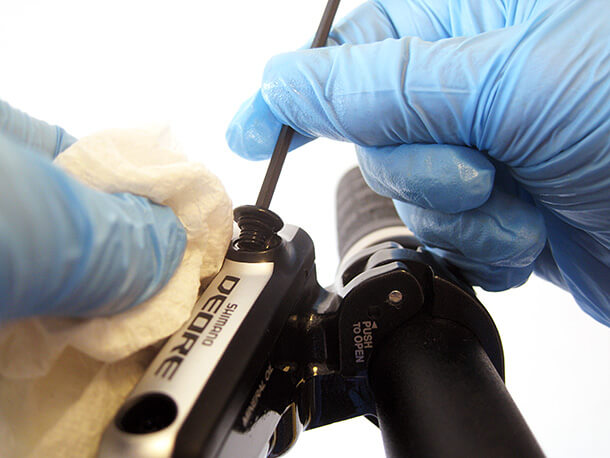
Next unthread the master cylinder syringe and adaptor together. Allow a small bead of mineral oil to remain inside the bleed port but be sure to catch any other drips of mineral oil with your paper towel.

Step 15
Reinstall the master cylinder bleed port screw and o-ring and wipe away any excess mineral oil with your paper towel.
Step 16
If you removed the wheel, brake calliper and brake pads during the bleed process, now is the time to reinstall them. Confirm that all bolts are tight and that the brake functions correctly. Visually check the lever and calliper for any leaks whilst operating the brake. If all is well you're ready to ride!
So have you followed this guide with success? Do you have any tips of your own on how to make the bleed procedure easier or faster? Leave us a comment below.


