
How to Bleed Hayes Dyno Brakes
How to Bleed Hayes Dyno Brakes
Today we're going to roll through the Hayes Dyno bleed process. The Dyno is a relatively new disc brake aimed at the cross country/all mountain market. We've got the Dyno Comp version here but the guide can also be applied to the Hayes Dyno Sport disc brake.
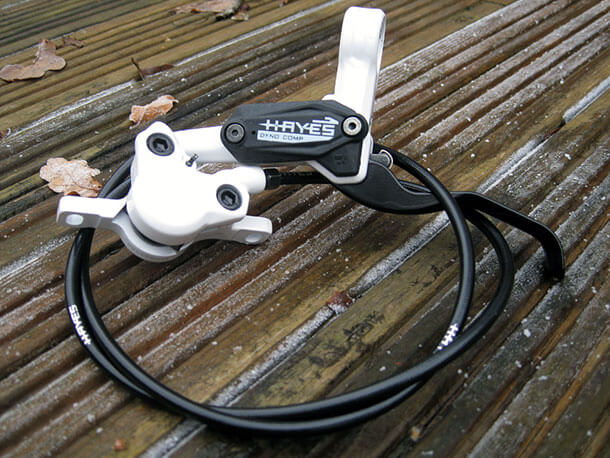
| It is not necessary to remove the brake system from the bike in order to use this guide or in order to perform the bleed. If you do choose to leave the brake on the bike (especially the calliper) please take precautions to ensure that your brake pads and rotors do not come into contact with brake fluid from accidental spillage. |
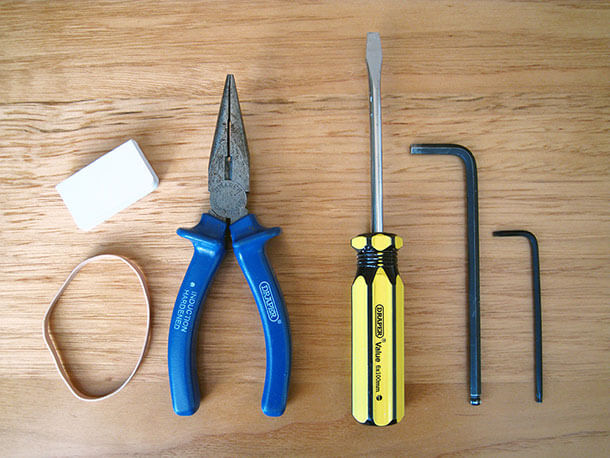
Things you'll need
- Hayes Dyno/Prime Bleed Kit
- Needle-nosed pliers
- 5mm Allen wrench
- Bleed block or disc rotor
- Flat blade screwdriver
- Paper towels
- Safety glasses
Prepare your calliper
Assuming you're going to do this the proper way and remove your brake pads during the bleed, here are a few preliminaries to prepare your calliper for the bleed procedure. If you're an experienced brake bleeder or you just like to live dangerously you can skip to the bleed process.
If your brake is currently fitted to your bike (which is usually the case) start by removing the wheel of the brake you wish to bleed first.
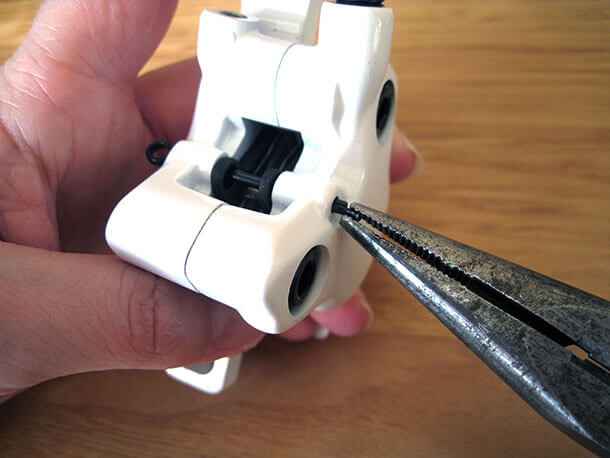
Then using your needle-nosed pliers, remove the brake pad retaining pin from the calliper. Don't remove the pads just yet.
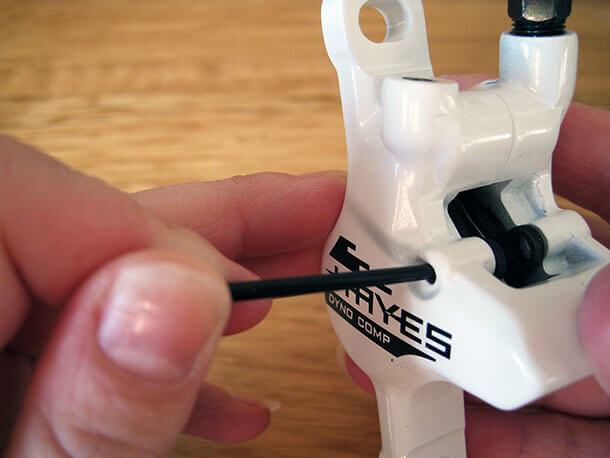
Next, take your flat blade screwdriver and place it between the brake pads and twist gently, taking care not to damage the surface of your pads. This will reset the pistons to their original position for the bleed.
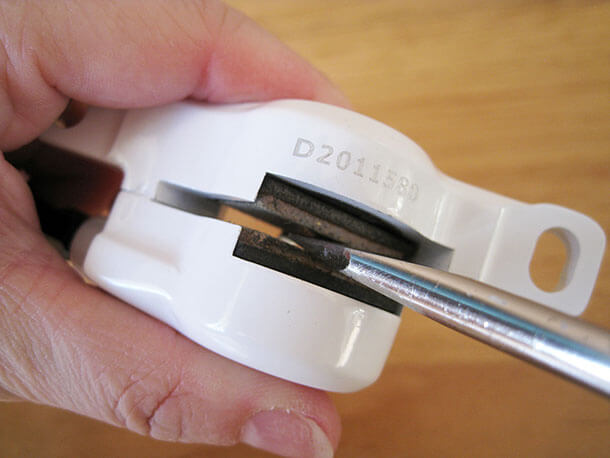
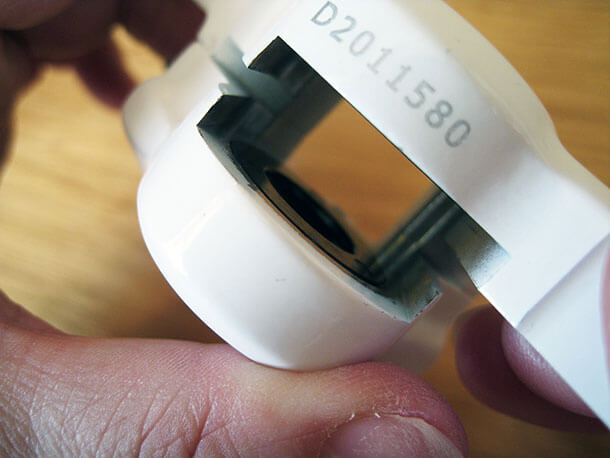
Now you'll need to place something between the pistons to keep them in that position throughout the bleed process. Anything of the correct size will do as long as its not a compressible object. If you don't have anything suitable find out how to make a bleed block.
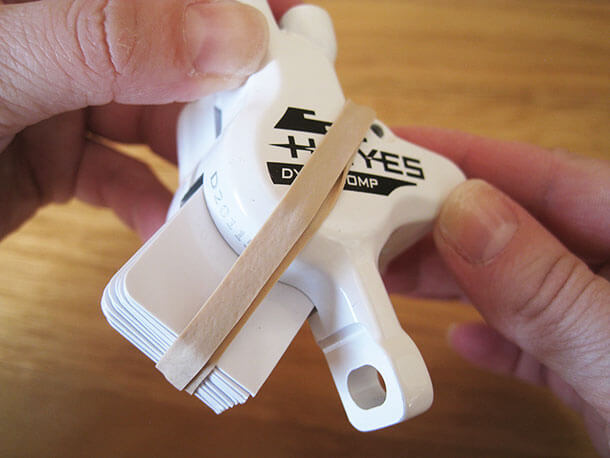
Once you've prepared your calliper it's time to get on with the bleed process.
Step 1
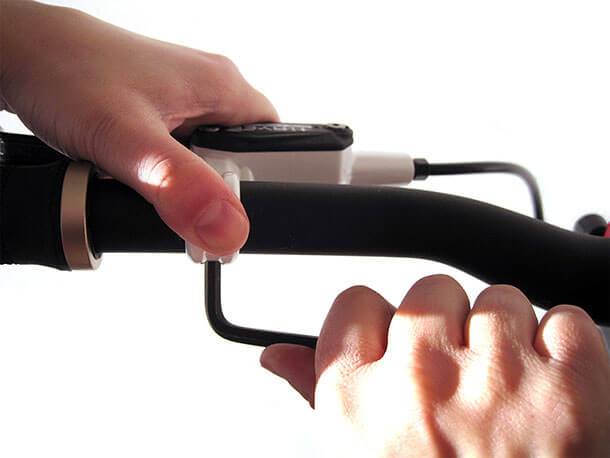
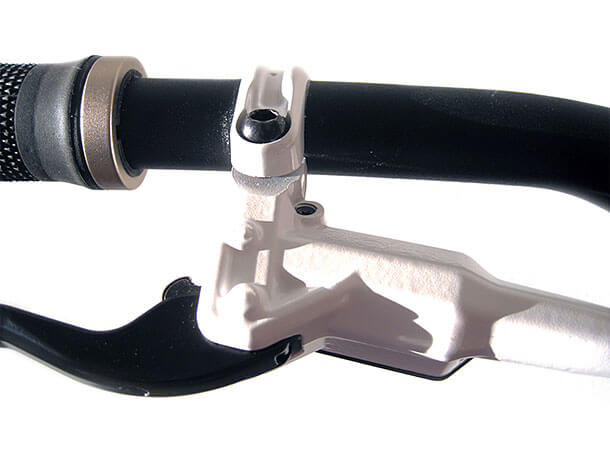
Start by loosening the brake lever fixing bolt/s to enable the lever assembly to move freely on the handlebar. Set the lever so that the bleed port is at the highest point (facing directly upwards). Temporarily fix in position.
Step 2
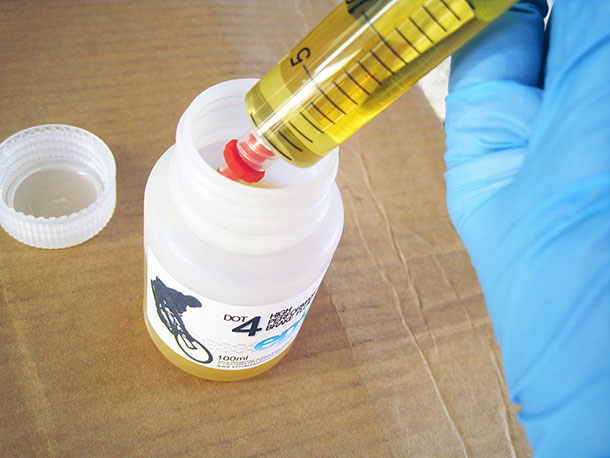
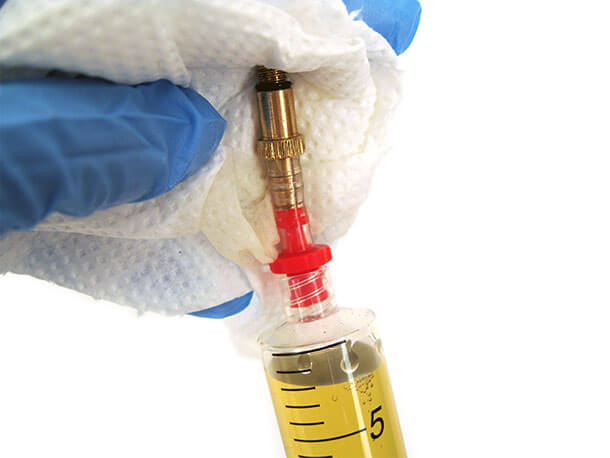
Fill one syringe 3/4 full with DOT brake fluid. Hold the syringe with the tip pointed up, tap the side of the syringe firmly to dislodge air bubbles so they rise to the top; and then, using a paper towel to cover the tip, push the air out from the syringe.
| DOT brake fluid is corrosive. Always wear safety glasses and protective gloves when handling DOT fluid. Keep containers out of reach of children. |
Step 3
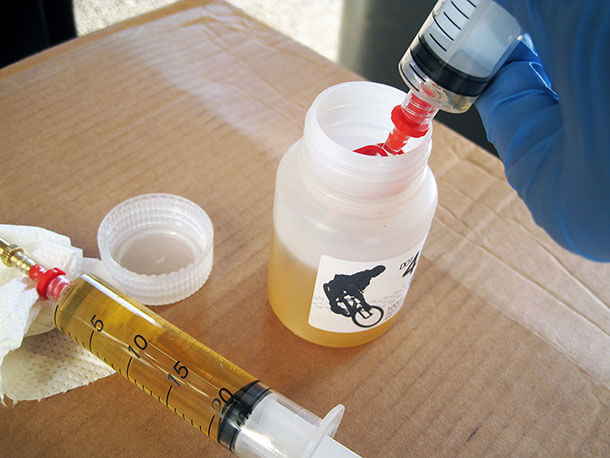
Take the other syringe and draw up 3-4mls of brake fluid from the bottle. Be sure to remove all remaining air from within the syringe as before.
Step 4
Remove the lever bleed port screw using the Torx screwdriver bit and set aside safely. Screw in the syringe and threaded bleed adaptor. Close the tube clamp on the syringe tubing.
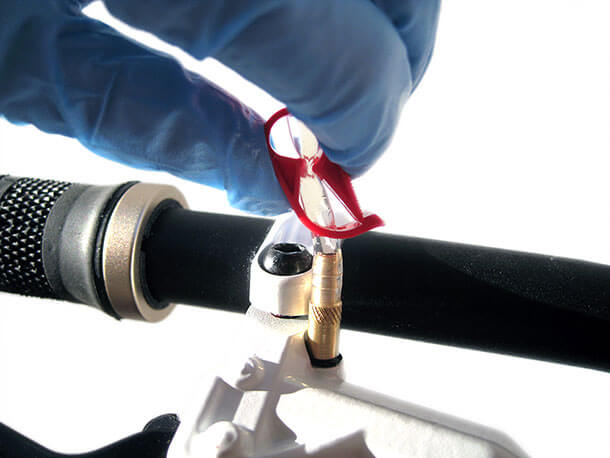
Step 5
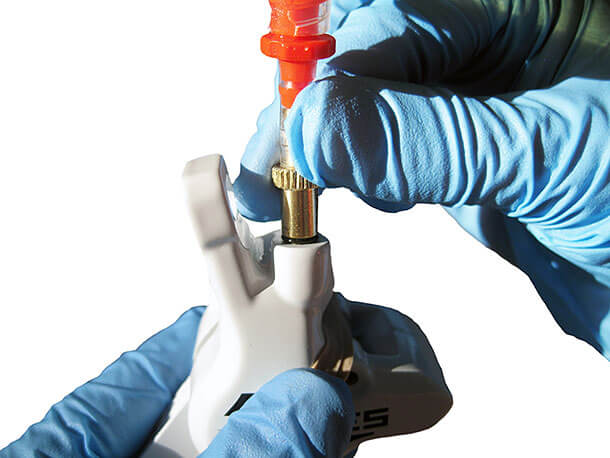
Orientate the calliper so that the bleed port is facing up. Remove the calliper bleed port screw and set aside. Screw the 3/4 full syringe into the calliper bleed port.
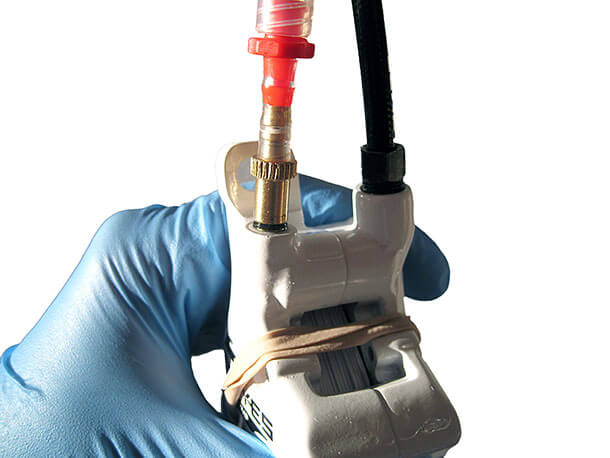
Step 6
Gently pull on the plunger of the calliper syringe to create a vacuum within the calliper. This will release any air bubbles which may be trapped inside the calliper.
| Do not pull so hard as to draw air past the syringe seal. |
Step 7
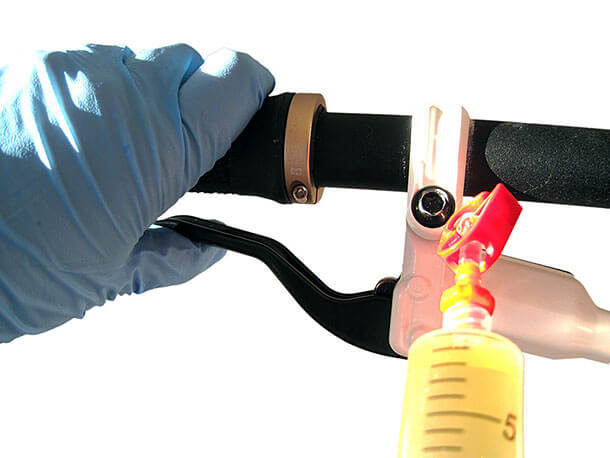
Release the tube clamp on the lever syringe. Begin to inject fluid by pushing on the plunger of the calliper syringe. You should start to see brake fluid entering the lever syringe along with any air which as present in the brake system.
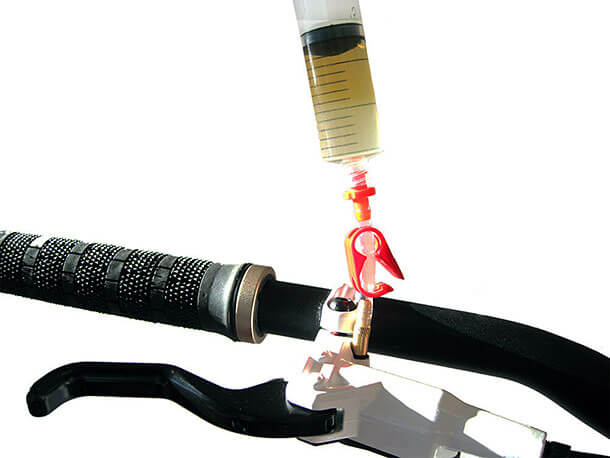
Step 8
After you have injected around half of the fluid within the syringe continue to inject but at the same time rotate the lever assembly on the handlebar upwards (lever at 12 o'clock) and then downwards (lever at 6 o'clock), this will help to dislodge any remaining air bubbles.
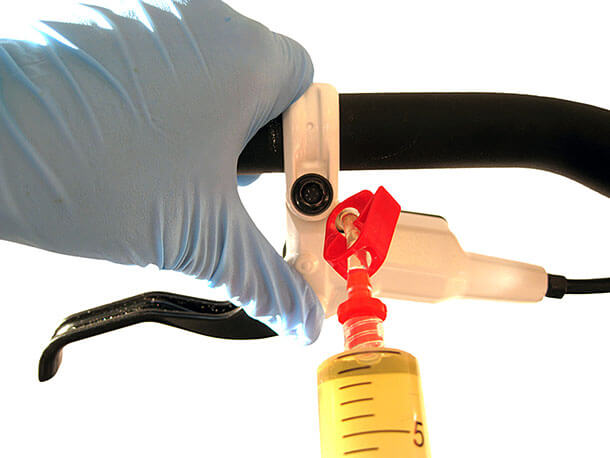
| During this step quickly stroke the brake lever and allow it to snap back to its natural position, do this a few times. This will help to dislodge any trapped air bubbles. |
Step 9
Once no more air bubbles are mixed with the fluid entering the lever syringe, continue to gently push on the calliper syringe and close the clamp on the lever syringe.
Step 10
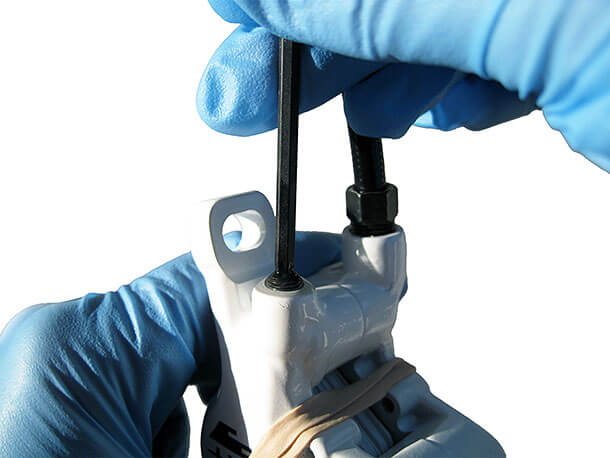
Stop pushing on the plunger of the calliper syringe. Unscrew the calliper syringe from the calliper. Allow a small bead of brake fluid to form inside the bleed port and then refit the bleed port screw.
| Tightening torque: 1.3-1.5Nm. Do not over tighten. |
Step 11
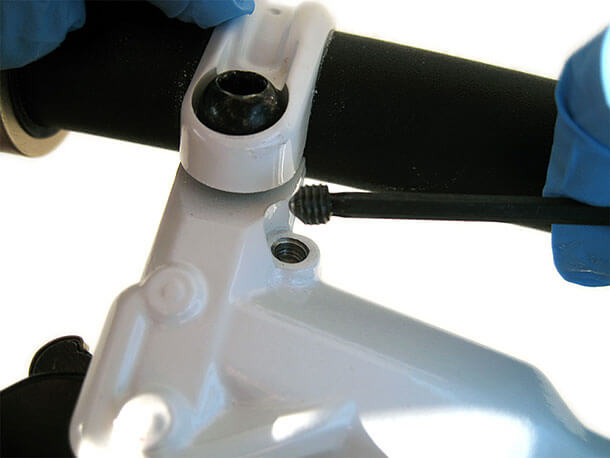
Remove the syringe assembly from the lever and refit the lever bleed port screw. Hayes recommend that you reinstall the bleed port screw whilst the lever is at the 6 o'clock position.
| Tightening torque: 1.3-1.5Nm. Do not over tighten. |
Step 12
Depress the brake lever a few times. The action should feel stiff and not spongy. If the lever feels spongy you should repeat the bleed process until you have a firm lever feel.
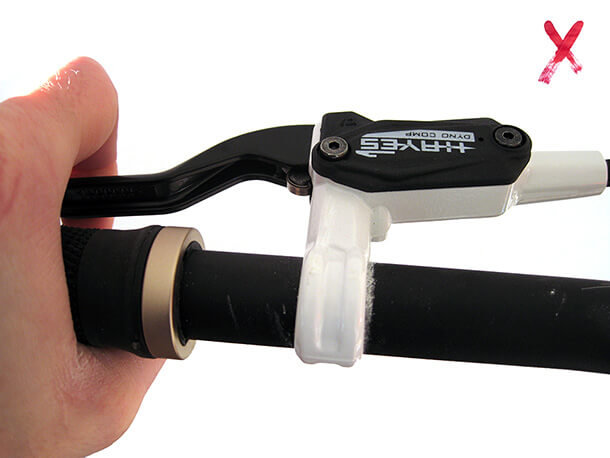
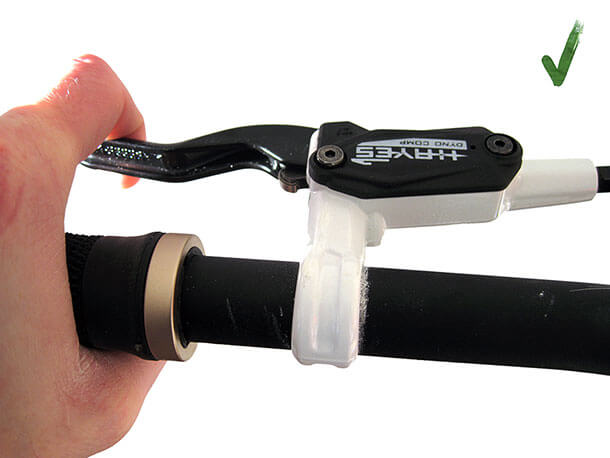
Step 13
Wipe the lever and calliper with a clean damp cloth to remove any brake fluid. Return the brake lever to its normal riding position.
Step 14
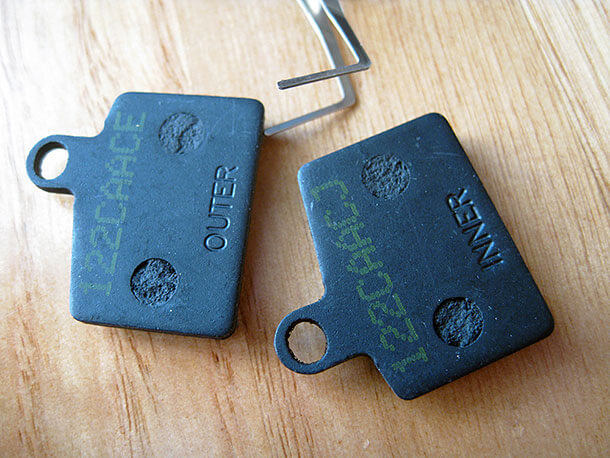
Refit your brake pads and retaining pin/screw (if you removed them earlier).
| Note the 'inner' and 'outer' markers on the brake pads. Ensure they are reinstalled in the correct position. |
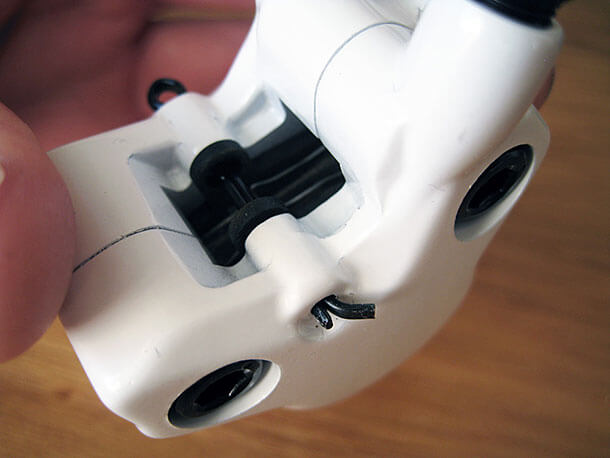
| Ensure correct installation of the brake pad retaining pin. Use your needle-nosed pliers to achieve this and avoid losing your brake pads out on the trail. |
Step 15
Refit the brake calliper to the frame and reinstall the wheel (if you removed them earlier). Operate the brake once again. Observe the system for leaks around the lever and calliper bleed ports. If all is well you're ready to ride.


