


How to Bleed RockShox Charger Damper
How to Bleed RockShox Charger Damper
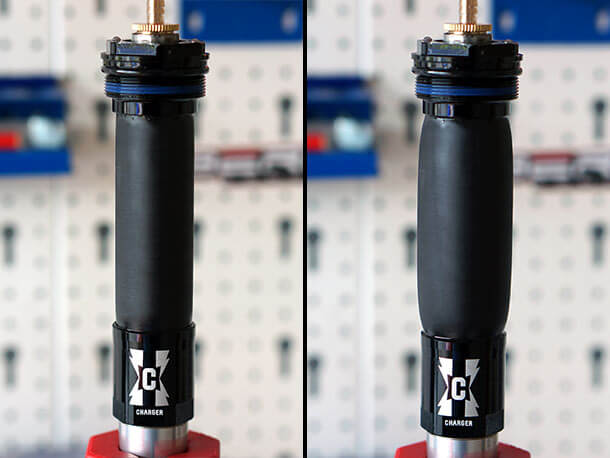
In this guide we'll show you how to bleed your RockShox Charger Damper using our Charger Damper bleed kit. We'll be working on our Pike RCT3 fork for the purposes of this guide but the steps will be similar for the Charger Damper in your BoXXer fork too.
Just one thing before we get going. I debated for a long time whether it would be best to remove the Charger Damper from the fork before bleeding it or if the process could be simplified by leaving the Damper in the fork. It sure would be quicker to do the latter.
After plenty of time researching I couldn't find a definitive answer so I decided to contact RockShox themselves who said this:
| "For best performance, remove the damper cartridge from the fork. This will allow for a full bleed at the cartridge's full extension." |
| - SRAM USA |
I guess that answered my question. Let's get started by taking a look at the tools involved to get this thing out.
Things you'll need
- RockShox Charger Damper Bleed Kit
- 30mm Socket with 1/2" drive handle
- 6mm Socket
- 15mm Socket
- 15mm Cone spanner
- Hex wrenches (2.5mm, 4mm, 5mm)
- RockShox 0w30 Suspension Oil
- Small Circlip Pliers
- Needle-nose pliers
- A new RockShox crush washer
- Bicycle work stand or vice with soft jaws
- Torque wrench (recommended)
- Paper towels or clean rag
- Safety Glasses
- Isopropyl alcohol (spray or wipes)

Bleed Kit
Our very own RockShox Charger Damper Bleed Kit contains the Charger Damper bleed tip and a secure locking syringe to eliminate leaks and keeps the fluid in the system instead of all over your workshop. We also supply 100ml Genuine RockShox 3wt Suspension Fluid with every kit.
Step 1
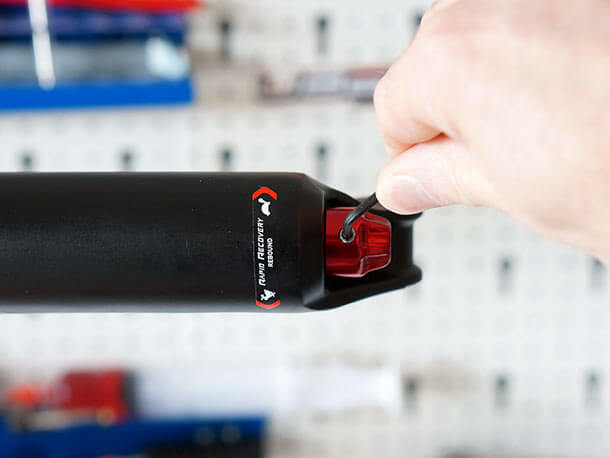
Use a 2.5mm hex wrench to loosen the set screw and remove the rebound adjuster knob located at the bottom of the drive side fork leg.
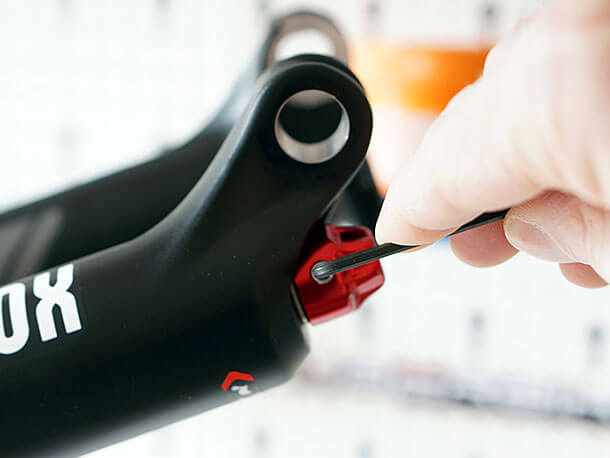
Step 2
Use a 5mm hex wrench to remove the bottom bolt. Use a rag to catch the small amount of suspension oil which will exit from the hole in the lower leg.
Step 3
RCT3 Only: Use a 2mm hex wrench to remove the low speed adjuster knob screw and then remove the low speed adjuster knob. Use a 6mm socket wrench to loosen the compression mode adjuster knob retaining nut. Remove the adjuster from the fork.
RC Only: Use a 4mm hex wrench to remove the knob retaining nut. Remove the low speed adjuster knob from the fork.

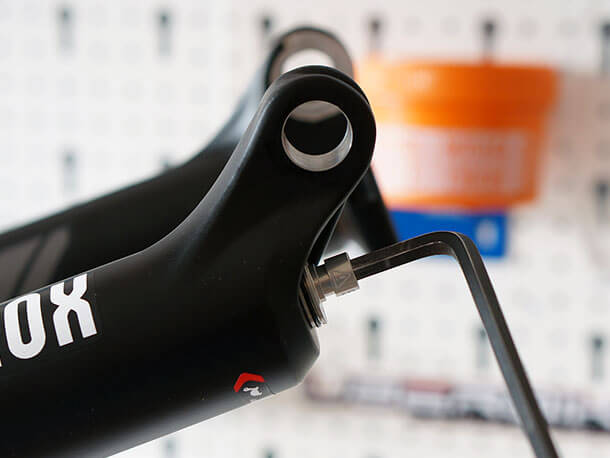
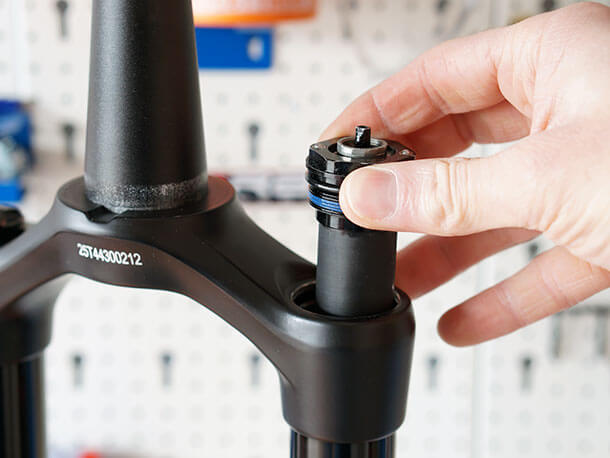
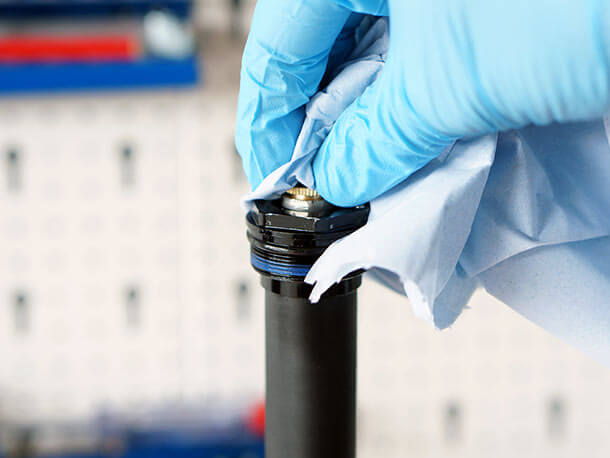
Step 4
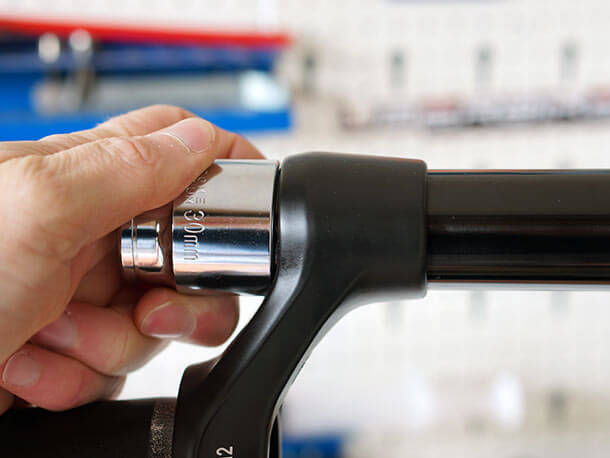
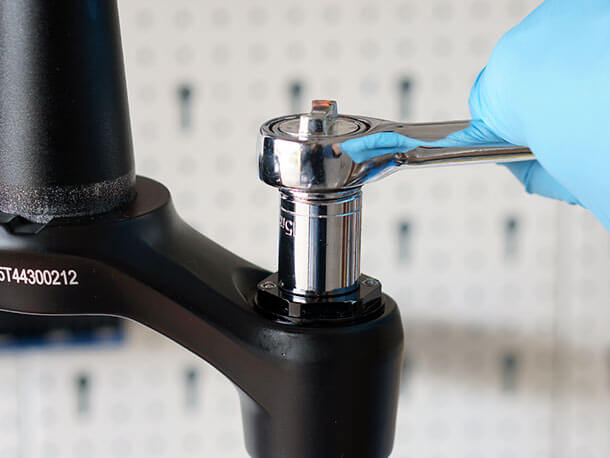
Use a 30mm socket wrench to loosen the damper top cap. Be careful not to let the socket slip and damage the fork.
Remove the Charger Damper assembly from the upper tube and wipe the whole damper assembly over with a paper towel or rag
| It can sometimes be difficult to remove the Charger Damper from the fork. Compressing the fork will expose more of the Charger Damper for you to get a hold of. Pull firmly to dislodge the damper unit. |
Step 5
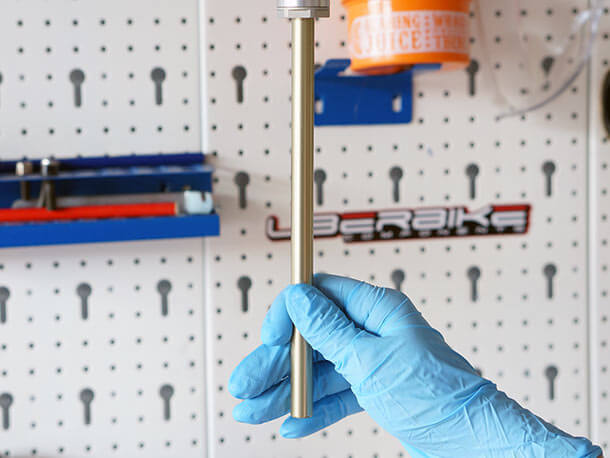
Use a work stand to secure the Charger Damper by the cartridge tube just beneath the rubber bladder.
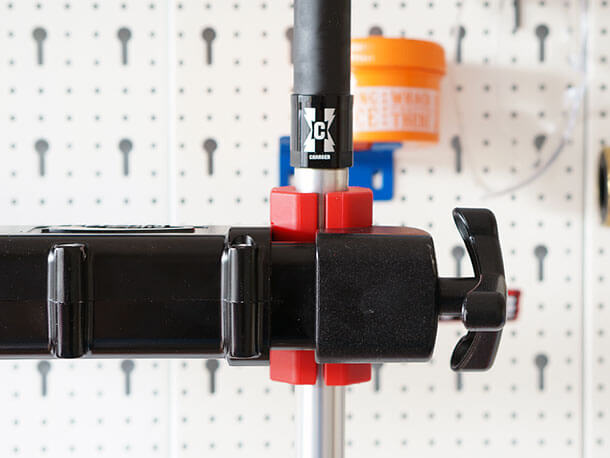
| Do not use excessive clamping force or secure the Charger Damper by its rubber bladder. |
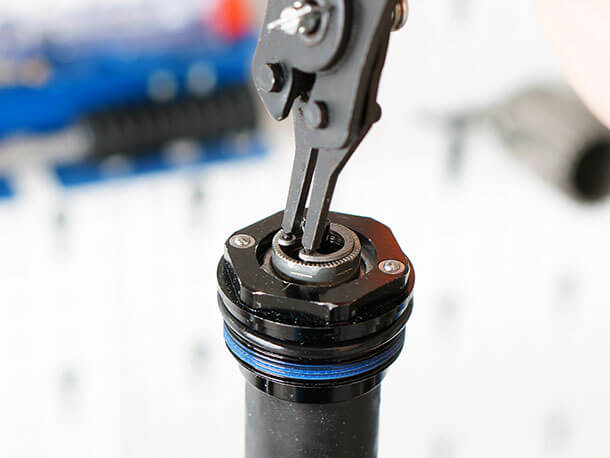
Step 6
RCT3 Only: Use small circlip pliers to remove the retaining ring from the low speed compression adjuster.
RC Only: Use small circlip pliers to remove the retaining ring from the bleed plug.
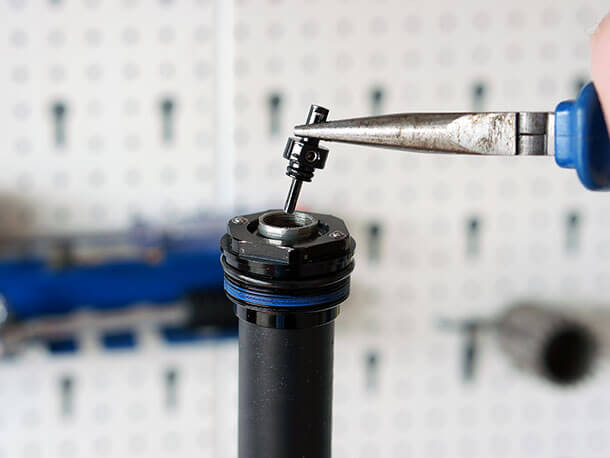
Step 7
RCT3 Only: Use needle-nose pliers to remove the low speed compression adjuster from the compression top cap.
RC Only: Use needle-nose pliers to remove the bleed plug from the compression adjuster.
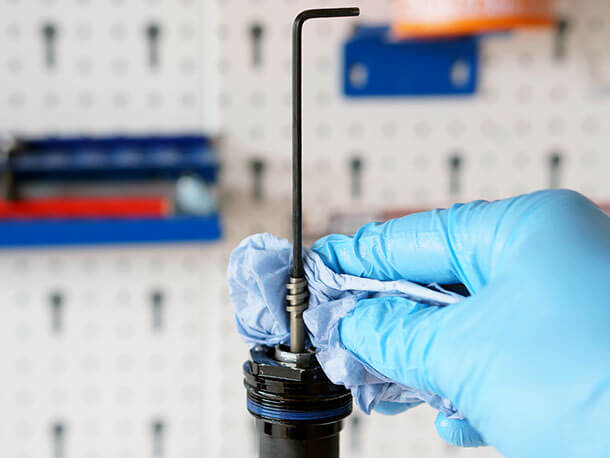
Step 8
RCT3 Only: Use a 2.5mm hex wrench to remove the low speed compression needle.
Step 9
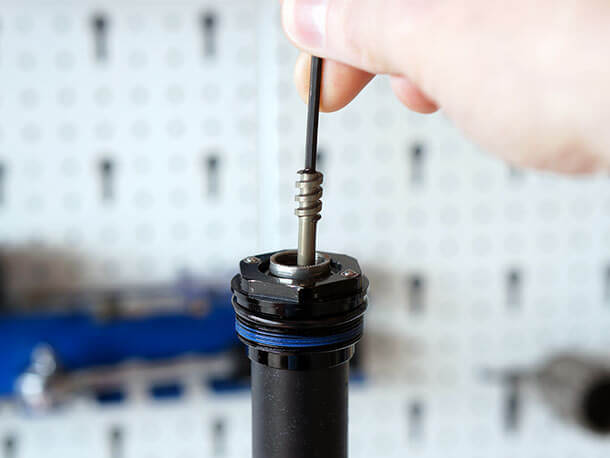
Open the rebound assembly by pulling down on the rebound shaft extend it. Then insert a 2.5mm hex wrench into the bottom of the rebound shaft and turn it counter-clockwise until it stops.
Step 10
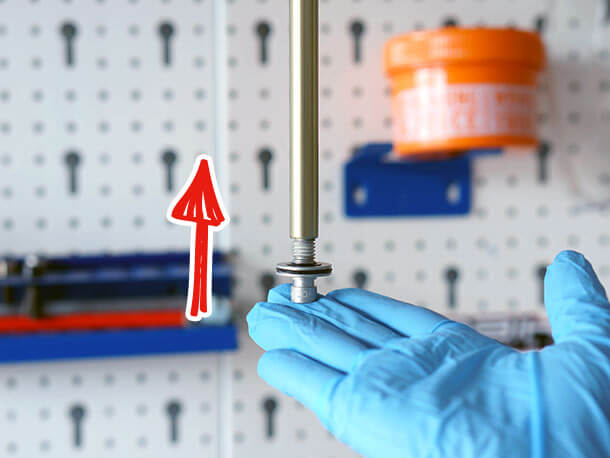
Use your fingers to install the bottom bolt into the rebound damper shaft - 2-3 turns is enough, then pull down on the bottom bolt to extend the shaft.
Step 11
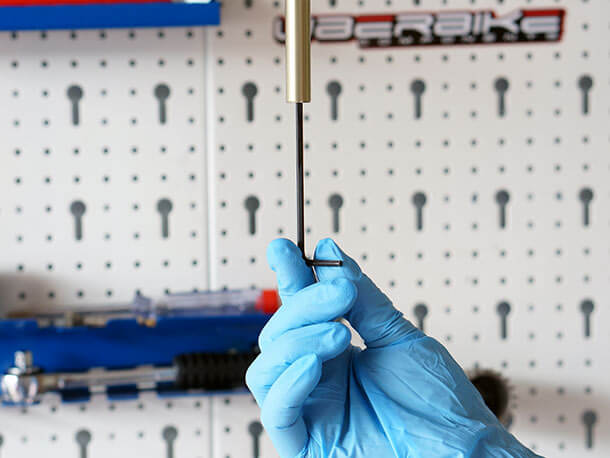
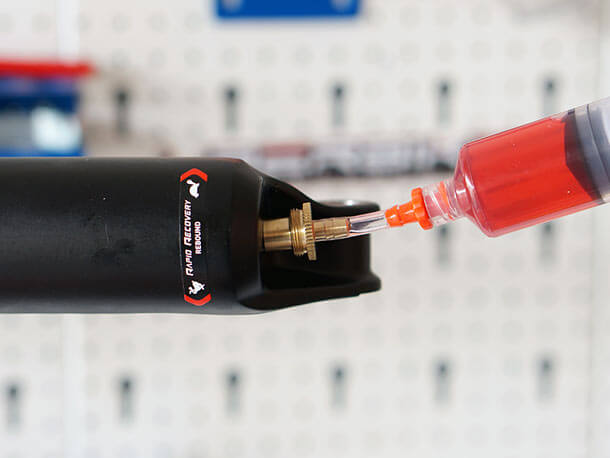
Take your bleed syringe from your bleed kit and fill it half full with 3wt suspension fluid from the bottle by immersing the tip and pulling back on the plunger. Be sure to remove all of the air from within the syringe. Thread the syringe into the compression top cap assembly until finger tight.
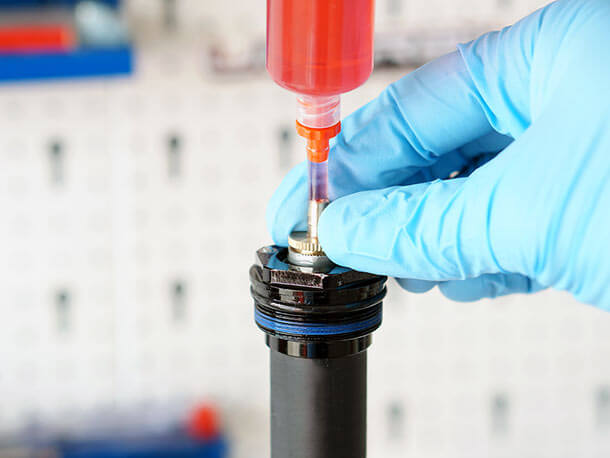
Use a 15mm cone spanner to turn the compression cam assembly counter-clockwise to the open position.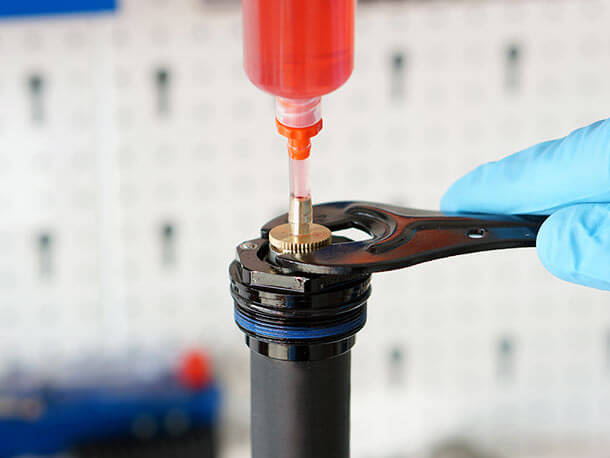
Step 12
Create a vacuum in the damper assembly by pulling up on the syringe plunger and holding the rebound damper shaft in place. This will force bubbles out of the damper assembly.
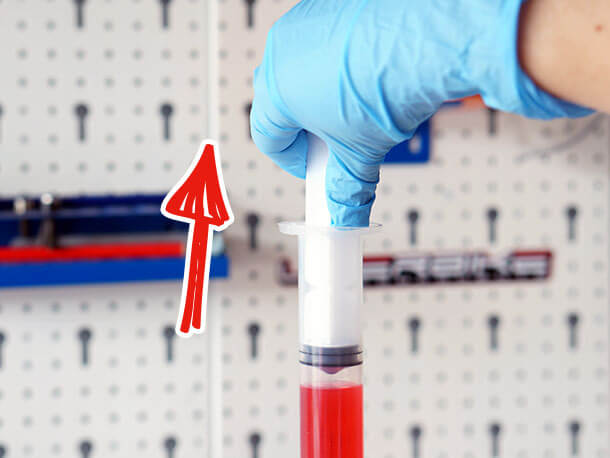
Slowly push up and pull down on the rebound shaft multiple times to purge air bubbles from the bladder assembly
Pressurise the damper assembly by pushing down on the syringe plunger and simultaneously pulling down on the rebound damper shaft.
Continue to push down on the syringe plunger and simultaneously cycle the rebound damper shaft up and down a few times to purge air bubbles from the damper. The bladder will expand and contract. This is normal.
Repeat pulling a vacuum and pressurising the damper assembly until only very small bubbles emerge from the damper assembly.
Step 13
Make sure the rebound shaft is fully extended. Push the syringe plunger down and release it. Allow the bladder to come to its natural resting position by waiting a few moments until the syringe stops filling. Use a rag to cover the bleed tip and charger bleed port, then unthread and remove the syringe.
| Caution - Eye Hazard. Fluid may be ejected from the bladder assembly if the bladder is not in its resting position. Wear safety glasses. |
Empty the remaining 3wt suspension fluid into a container for safe disposal.
Step 14
RCT3 Only: Use a 2.5mm hex wrench to thread the low speed compression needle into the bladder assembly until it stops, and then unthread it 1/4 of a turn. Wrap a paper towel around the opening to soak up any excess suspension fluid.
Step 15
RCT3 Only: Insert the low speed compression adjuster into the compression cam assembly. Push down and turn the low speed compression adjuster clockwise until it clicks into place.
RC Only: Use needle-nose pliers to insert the bleed plug into the compression adjuster until it clicks into place.
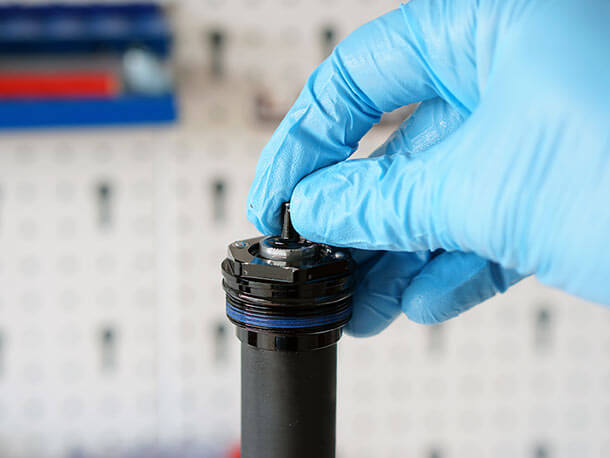
Step 16
Use small circlip pliers to install the inner retaining ring into the retaining ring groove.
| Check that the retaining ring is properly seated in the retaining ring groove by using the retaining ring pliers to rotate the retaining ring and seal head back and forth a few times. |
RCT3 Only: The low speed compression adjuster must be installed properly for the retaining ring to be seated in its grove.
RC Only: The bleed plug must be installed properly for the retaining ring to be seated in its grove.
Step 17
Remove the rebound bolt from the rebound damper shaft.
Step 18
Spray, or use isopropyl alcohol wipes or damp rag on the Charger Damper assembly and clean it thoroughly and then dry with a clean rag.
Step 19
Make sure that the rebound shaft is fully extended by pulling it down, then insert the Charger Damper into the top of the drive side upper tube and give it a few turns with your 30mm socket until it is threaded in about half way.

Step 20
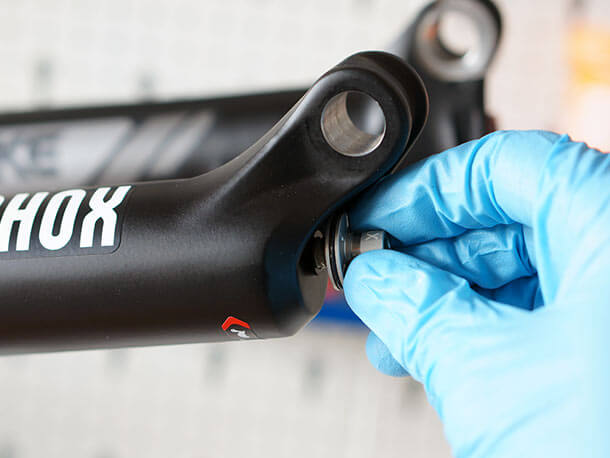
Now use your work stand to mount the fork in a horizontal position. Draw up 5ml of RockShox 0w30 fork oil into your syringe and inject it into the bottom of the drive side lower fork leg.
Use a rag to clean all excess fluid/oil from the lower leg.
| Be sure to inject the fluid into the lower leg of the fork and not the threaded rebound damper shaft inside. |
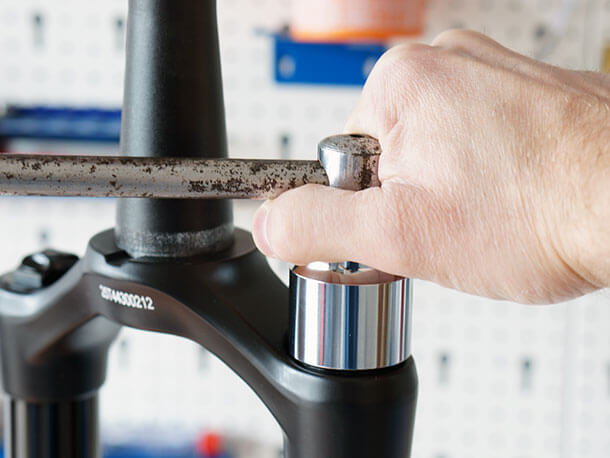
Step 21
Use your 30mm socket to tighten down the Charger Damper assembly while your fork is still in the horizontal position until it is hand tight.
Step 22
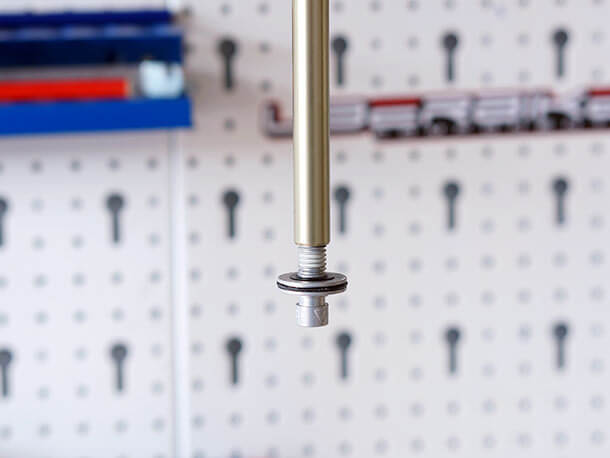
Remove the old crush washer from your bottom bolt and install a new one. Thread the bolt into the drive side shaft of the lower leg and tighten to 7.3 Nm (65 in-lb).
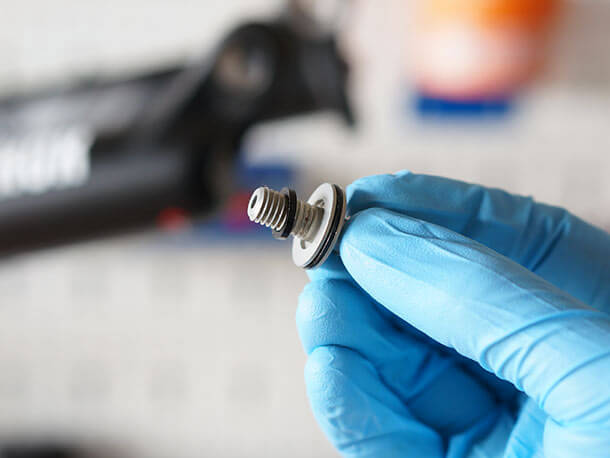
| Reusing or installing dirty or damaged crush washers can cause leaks. |
Step 23
While you're there reinstall the rebound adjuster knob onto the bottom bolt. Use a torque wrench with a 2.5mm hex bit socket to tighten the set screw to 1.1 Nm (10 in-lb).
| Hold the rebound adjuster knob in place during installation to prevent damage to the bottom bolt. |
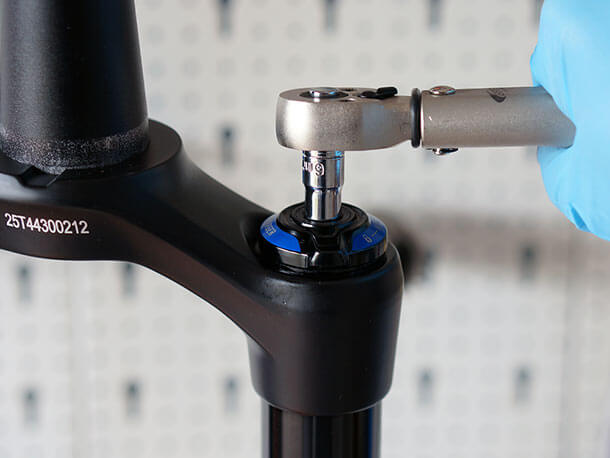
Step 24
Use your 30mm socket to tighten down the Charger Damper assembly to 28 Nm (250 in-lb). You can safely rotate the fork into the vertical position for this step if it's easier to do so
Step 25
RCT3 Only: Use a 15mm socket wrench to turn the compression cam assembly counter-clockwise until it stops.
RC Only: Use a 15mm socket wrench to turn the low speed compression adjuster clockwise until it stops.
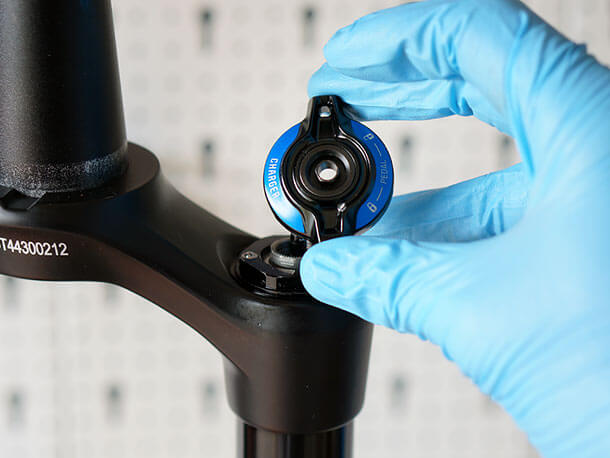
Step 26
RCT3 Only: Place the compression mode adjuster knob onto the RCT3 Charger Damper assembly with the long tab near the front of the crown. Turn the compression mode adjuster clockwise until it engages the first indent space.
RC Only: Place the compression mode adjuster knob onto the Charger Damper assembly with the long tab near the back of the crown. Turn the compression mode adjuster counter-clockwise until it engages the first indent space.
Step 27
RCT3 Only: Thread the knob retaining nut into the compression cam assembly. While holding down the compression mode adjuster knob, tighten the knob retaining nut. Turn the knob clockwise through both clicks until it stops, and use a torque wrench with a 6mm socket to tighten the knob retaining nut to 3.5-4 Nm (30-35 in-lb).
| Make sure the nut is not cross-threaded as it can move the adjuster knob beneath it. |
Step 28
RC Only: Install the knob retaining nut. While holding down the compression mode adjuster, use a torque wrench with a 4mm hex bit socket to tighten the nut to 4-5.5 Nm (40-50 in-lb).
Step 29
RCT3 Only: Install the low speed adjuster knob and knob retaining nut. Use a torque wrench with a 2mm hex bit socket to tighten the nut to 1-1.5 Nm (8-13 in-lb).
Phew! Good job.
So there it is, the RockShox Charger Damper bleed procedure. Remember you can find many of the tools needed to do this job in our tools section and of course don't forget to pick up the bleed kit.
Have you bled your Charger Damper using this guide? Or do you plan to get stuck in now that you're armed with the knowledge? Go ahead and leave us a comment below.


