

8 Top Tips for Brake Bleeding Success
8 Top Tips for Brake Bleeding Success
With the amount of guidance out there brake bleeding is something that more and more riders are taking on themselves.
Whether it be in an effort to save money, save time or to be safe in the knowledge that you know what to do when that spongy brake lever threatens to sabotage your next ride, brake bleeding can be a useful skill to have.
After you've bled a few sets successfully, you will no doubt start to pick up a few tips and tricks to make the job easier and faster.
In this article I will try to share some of the tips I have learned along the way to help you bleed your brakes more efficiently.
1. Back Bleeding is King

As you know, air bubbles trapped in a fluid will always rise to the top. So doesn't it seem logical to encourage them on their natural path and remove them at the highest point (the lever), rather than trying to force them down the hose and out through the calliper? We think so.
Many brake manufacturers advocate this method in their bleed instructions already. Forcing fluid up from the calliper and out through the lever is, in our experience, the most efficient way of removing the majority, if not all of the air from the brake system.
2. Orientation
Let's say you're bleeding your rear brake. You're convinced that every last air bubble has been removed from the brake but the lever still feels like crap. The culprit is most likely one last, stubborn air bubble trapped somewhere in the calliper.
I said rear brake specifically because rear brake callipers can sometimes be mounted in weird and wonderful positions depending on the frame. This can leave your calliper in a less than ideal position for brake bleeding.
In the picture below this Shimano brake calliper is mounted between the chain-stay and the seat-stay resulting in the bleed nipple (circled in red) to be at the lowest point on the calliper. The ideal spot for the nipple to be in during brake bleeding is marked by the green 'X', at the highest point on the caliper.
This brake calliper needs to be temporarily removed from the frame so that it can be rotated to the proper position during bleeding. Alternatively using a work stand to tilt the whole bike may help get the calliper in the ideal position.
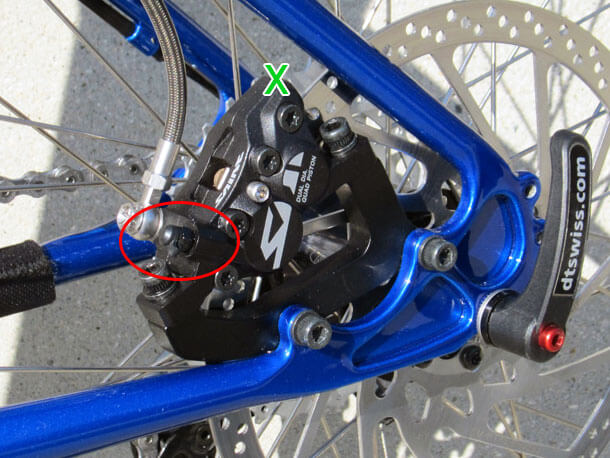
As we mentioned earlier air within a fluid will always rise to the top, so changing the position of your brake calliper, so that the fluid exit point is at the highest point, will aid the removal of air from the system.
| Tapping the calliper with a non marring object is also a good way to dislodge trapped air bubbles during brake bleeding. |
3. Forget the Bleed Block
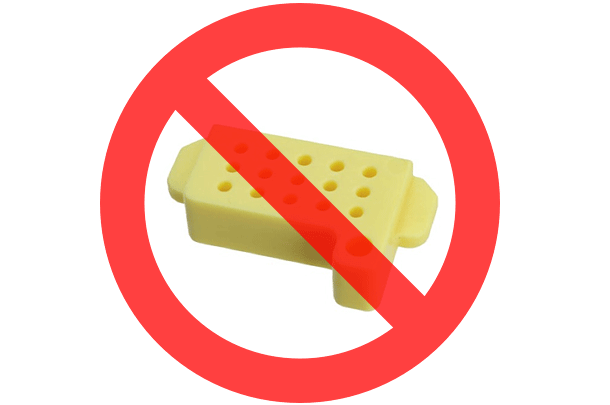
Even though bleeding brakes without a bleed block made it into our list of 5 mistakes to avoid when bleeding your brakes, it can be a real time saver.
Not having to remove the wheel and brake pads before bleeding your brakes can see you back on your trail a lot sooner. So in situations where you need the job done fast this can certainly speed things up.
There are two things to consider though:
- If brake fluid contacts your pads it will render them useless. Take extra care when bleeding your brakes with the brake pads in situ.
- Since the calliper pistons move outwards to compensate for brake pad wear, bleeding your brake without resetting the pistons means you will overfill the system with brake fluid. Not a big deal until you need to replace the brake pads, then you will need to expel the excess fluid from the system to allow the pistons to be pushed back fully.
As long as you're aware of the risks, the next time you're in a hurry try this method to get back on the trails a little sooner.
4. Get a Friend to Help

Picture this, you've propped your bike up against the wall, removed the reservoir cap and attached your calliper syringe. Hooray! The next thing you know the bike starts to move, the syringe tubing disconnects, you're spraying brake fluid everywhere and you've got an open reservoir full of fluid to worry about. Sounds like you need help.
Having a second person around, especially when bleeding levers with removable reservoir covers (Hope, old style Shimano) can help you avoid a mini catastrophe. Whether it's helping to steady the bike or simply topping up the reservoir with brake fluid - every little helps.
Next time you're in a fix bribe a riding buddy to help or if you've got no other choice you could always draft in the other half.
5. Degas Your Brake Fluid
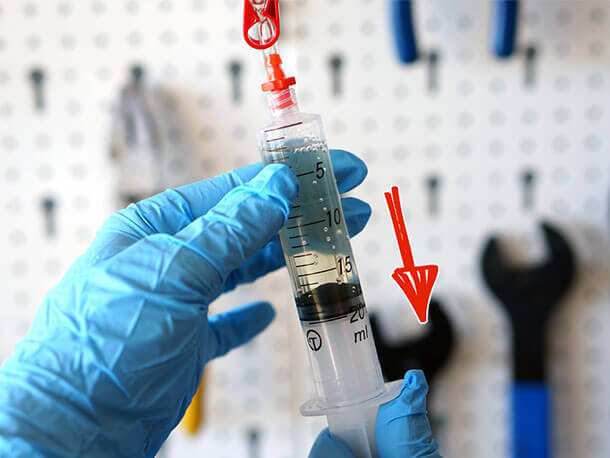
Degassing refers to the removal of tiny air bubbles from within the brake fluid. It is advocated by SRAM (and others) to be carried out before introducing fresh fluid into your brake.
Some use the technique and others believe it makes no difference, but there does appear to be some logic behind this practice. Since the removal of air bubbles is the primary reason for bleeding your brakes, it makes sense to rid the new brake fluid of as much air as possible.
Click here to learn how to degas your brake fluid.
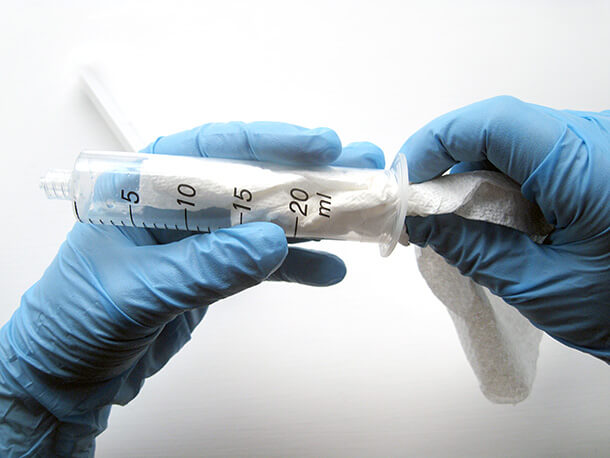
6. Clean Up as you Go

The very last step in all brake bleed instructions is usually to wipe down the brake's surfaces to clean up any brake fluid which may be left hanging around on your lever and calliper.
Unfortunately by then it could already be too late. It doesn't take long for corrosive DOT brake fluid to cause permanent damage to the surfaces of your bike's components or your frame.
Use a wet cloth to wipe away any drops you see throughout the bleed procedure and always use paper towels around the lever and calliper to catch any drips when attaching or disconnecting bleed fittings.
7. Protect Your Floor
Those of you with the space to do so will no doubt keep your pride and joy indoors rather than see them confined to a garage or shed. This may mean you will be more likely to perform maintenance indoors too.
If you do decide to bleed your brakes in your kitchen or front room (although we don't recommend it) be sure to protect the floor from brake fluid spillages.
DOT brake fluid is corrosive and will eat away at lacquered surfaces such as laminate wood flooring, and although mineral oil is non-corrosive it will still stain and ruin carpets.
An old mat or several layers of newspaper is all it takes to save your bacon in the event of an accident.
8. Look After Your Kit
DOT brake fluid is less than kind to most things it comes into contact with and your bleed kit is no exception. If left to its own devices it can turn any tubing opaque and eat away at syringe seals.
Look after your bleed kit and it will look after you! Ok, so it won't bring you breakfast in bed but rinsing it under the tap after each use will prolong its life meaning you won't have to buy a new one each time.
But even if you do forget, we can always help you to bring it back to life with our spares kit!
Over to You
Have you tried any of these tips when bleeding your brakes? Or maybe you've got a brake bleeding tip of your own to share. Let us know in the comments below.


